Configuring the Local PosSystem API Helper with Launcher 2.0
The LocalPosSystemApi Helper is currently in preview.
After reading this, you can set up and configure the LocalPosSystemApi Helper within a Launcher 2.0 deployment.
Introduction
The LocalPosSystemApi Helper is a Middleware component that exposes a local endpoint through which the POS System communicates with the fiskaltrust Middleware. It acts as a bridge between the POS System and the underlying Queue.
The LocalPosSystemApi Helper must be part of the same CashBox as the Queue it is intended to serve.
As the LocalPosSystemApi Helper is currently only supported on the Launcher 2.0 this setup does not work for France. Refer to the guide on how to setup the LocalPosSystemApi helper for the Middleware 1.2.
If you're interested in running this in Austria reach out to us as the launcher 2.0 is not enabled per default there.
Add a LocalPosSystemApi Helper
To add the LocalPosSystemApi Helper, navigate to Configuration / Helper in the fiskaltrust Portal and follow the steps below.
Note that the following figures and steps are exemplary.
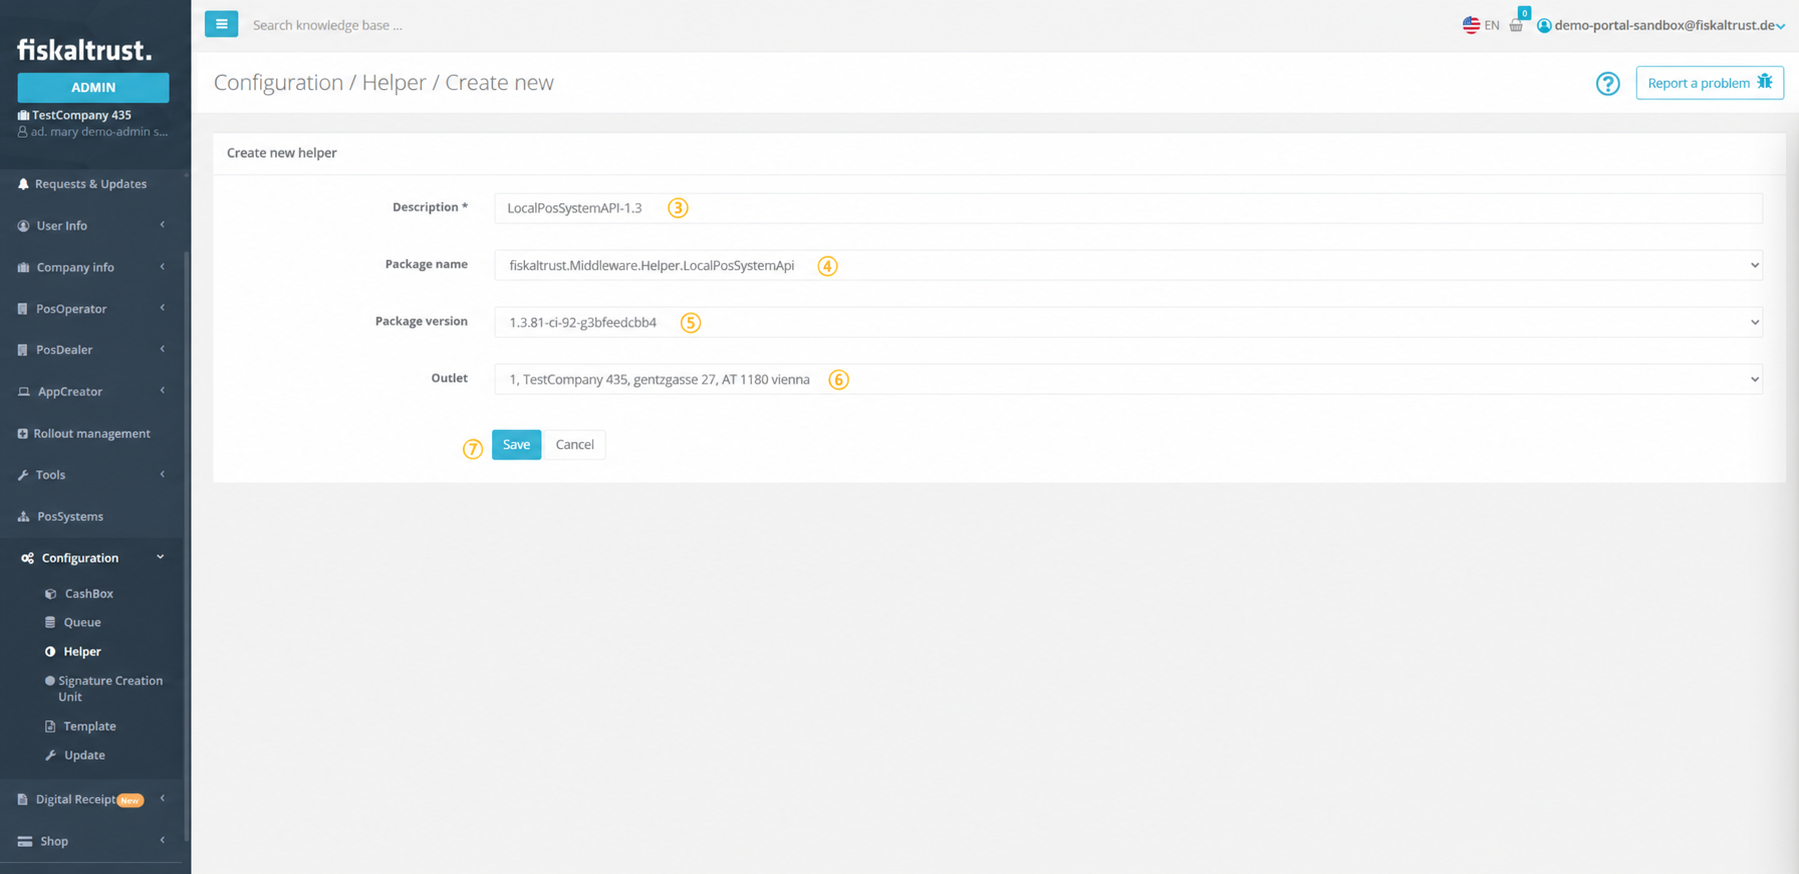
Figure 1. Helper configuration page in the fiskaltrust Portal where a LocalPosSystemApi Helper is added; steps are listed in Table 1.
| Steps | Description |
|---|---|
 | Navigate to Configuration/ Helper to get to the Helper configuration. |
 | Click +Add to create a new Helper. |
 | Add or edit a name for your Helper at Description. |
 | Select fiskaltrust.Middleware.Helper.LocalPosSystemApi from the Package name drop-down list. Note that this selection cannot be changed later. |
 | Select the latest Package version using the drop-down list. |
 | You can select one of the available outlets with the drop-down list. |
 | Click Save to save your changes. |
Table 1. Steps to add a LocalPosSystemApi Helper in the fiskaltrust Portal, as shown in Figure 1.
After the Helper has been saved, a success notification confirms that it has been created. The configuration window for the new Helper then opens automatically, allowing you to proceed with the configuration.
Configure a LocalPosSystemApi Helper
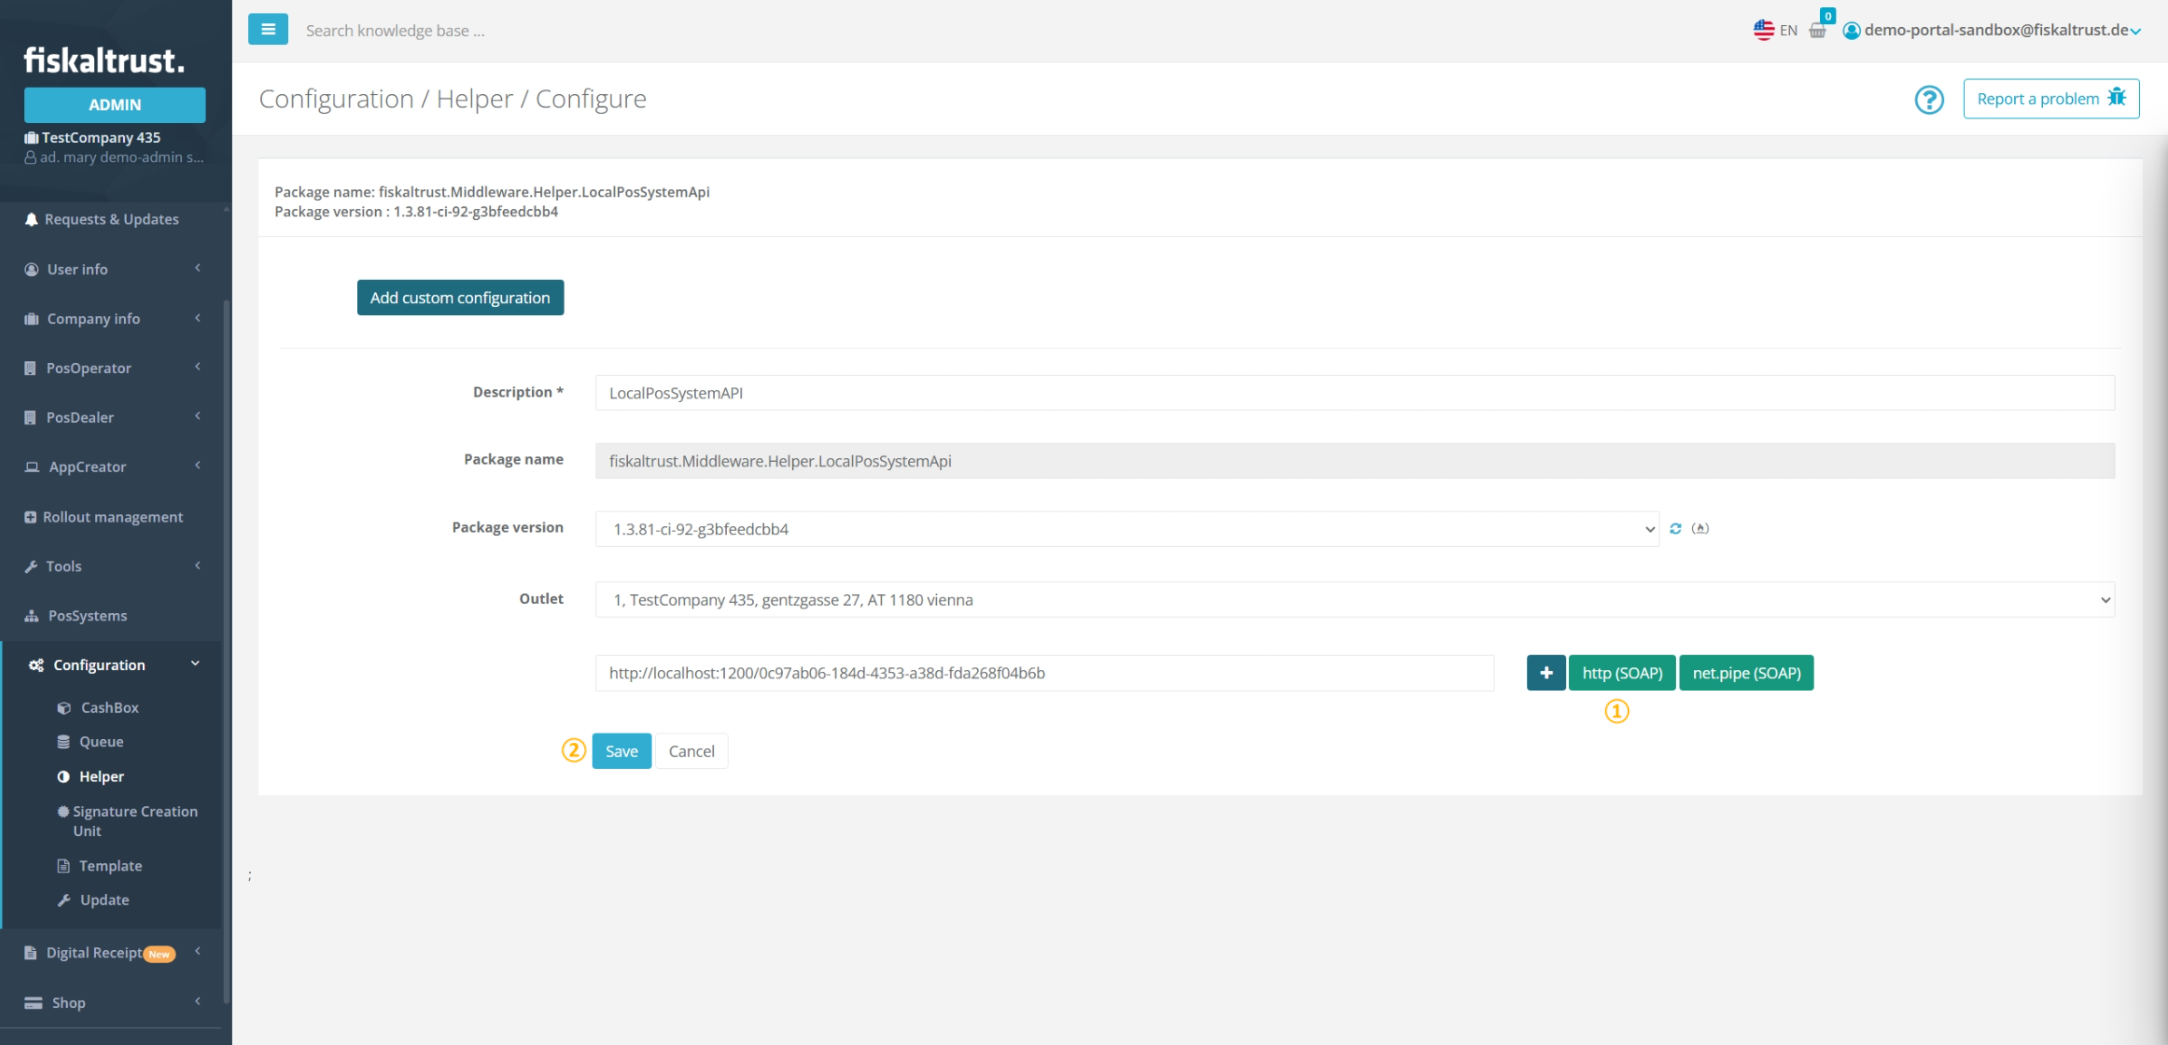
Figure 2. Configuration window of the new LocalPosSystemApi Helper; steps are listed in Table 2.
| Steps | Description |
|---|---|
| Click http to generate a URL that the POS system can use to access the Helper. You can also rename the URL if desired. |
| Click Save to save your changes and return to Configuration/ Helper. |
Table 2. Steps to configure the LocalPosSystemApi Helper and generate its URL, as shown in Figure 2.
Use a LocalPosSystemApi Helper
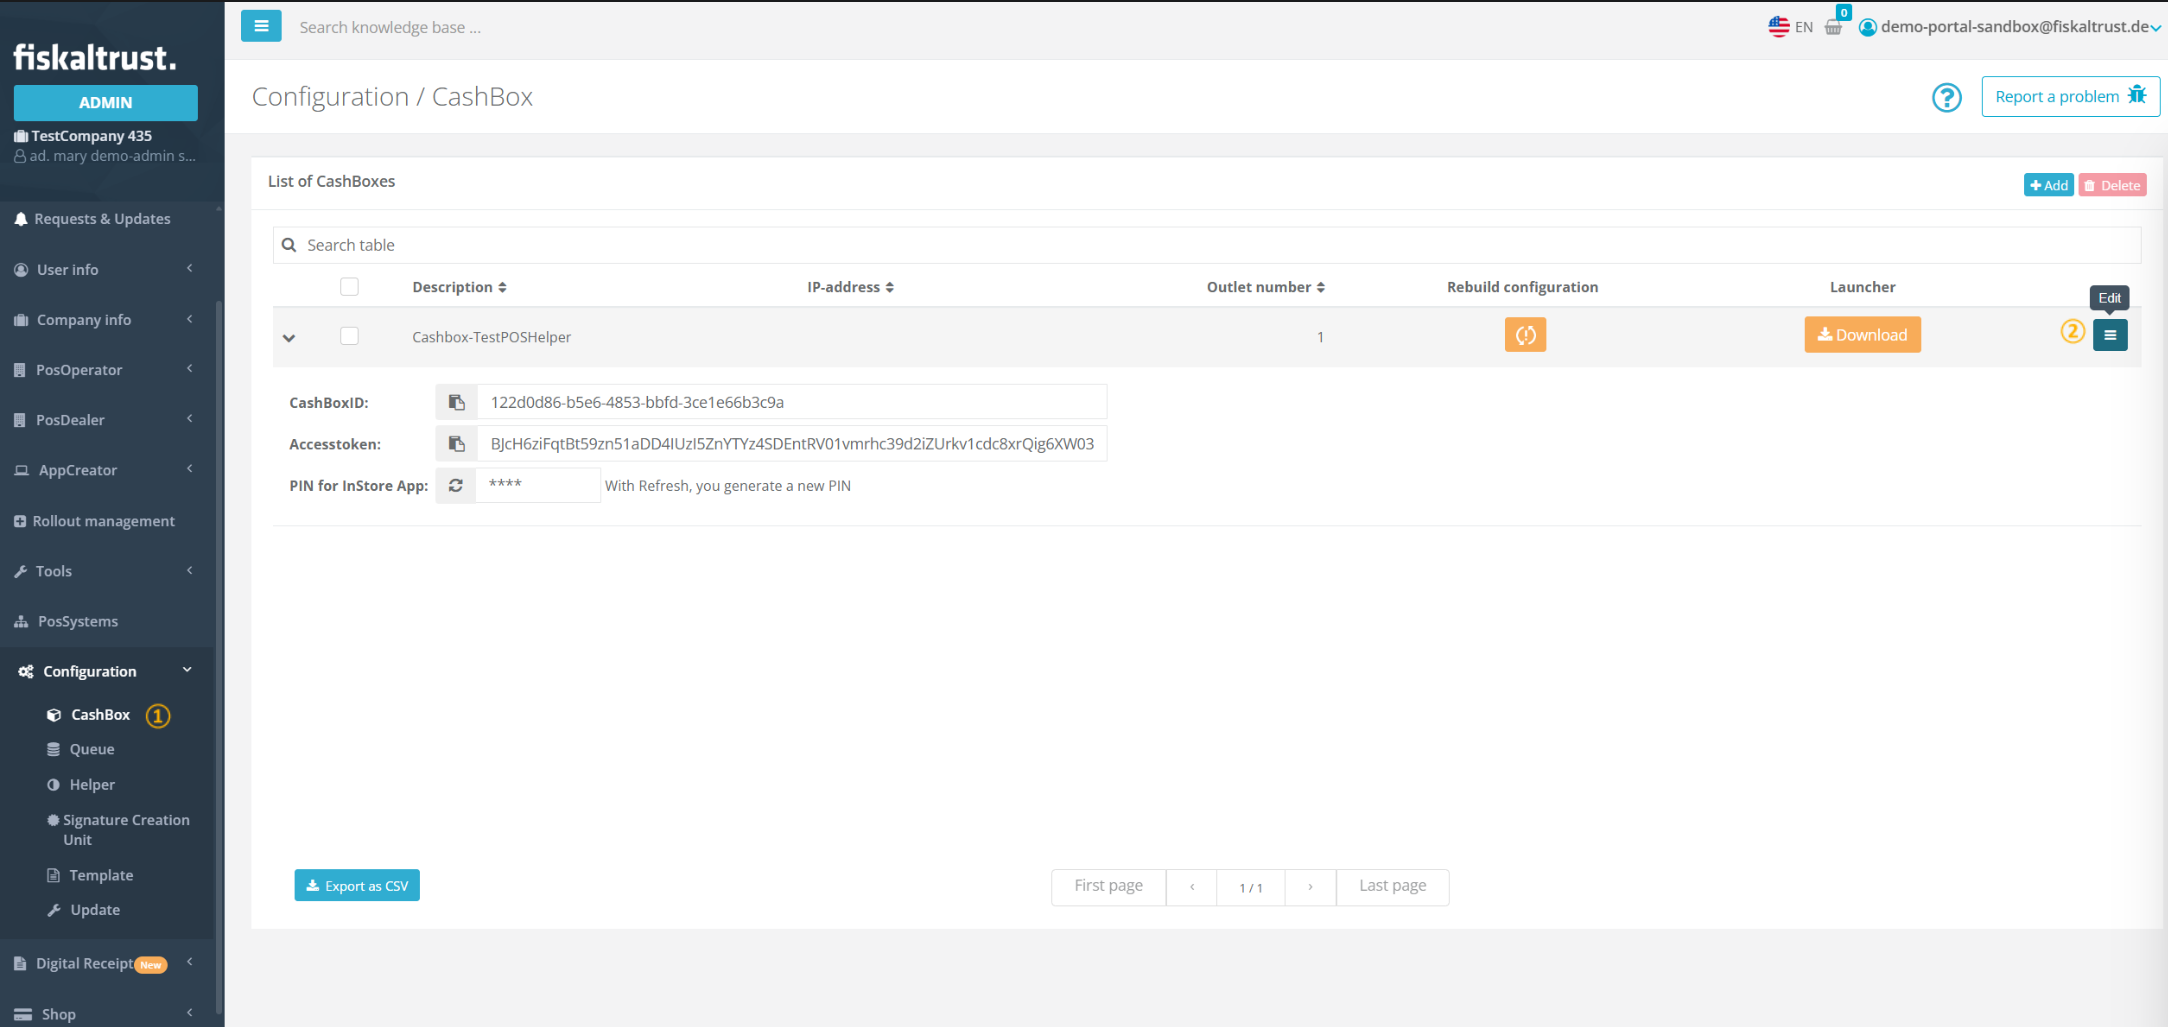
Figure 3. CashBox search on the Configuration / CashBox page in the fiskaltrust Portal; steps are listed in Table 3.
| Steps | Description |
|---|---|
| Navigate to Configuration / CashBox and search for the desired CashBox. |
| Click Edit to open the CashBox configuration. |
Table 3. Steps to locate and open the desired CashBox configuration, as shown in Figure 3.
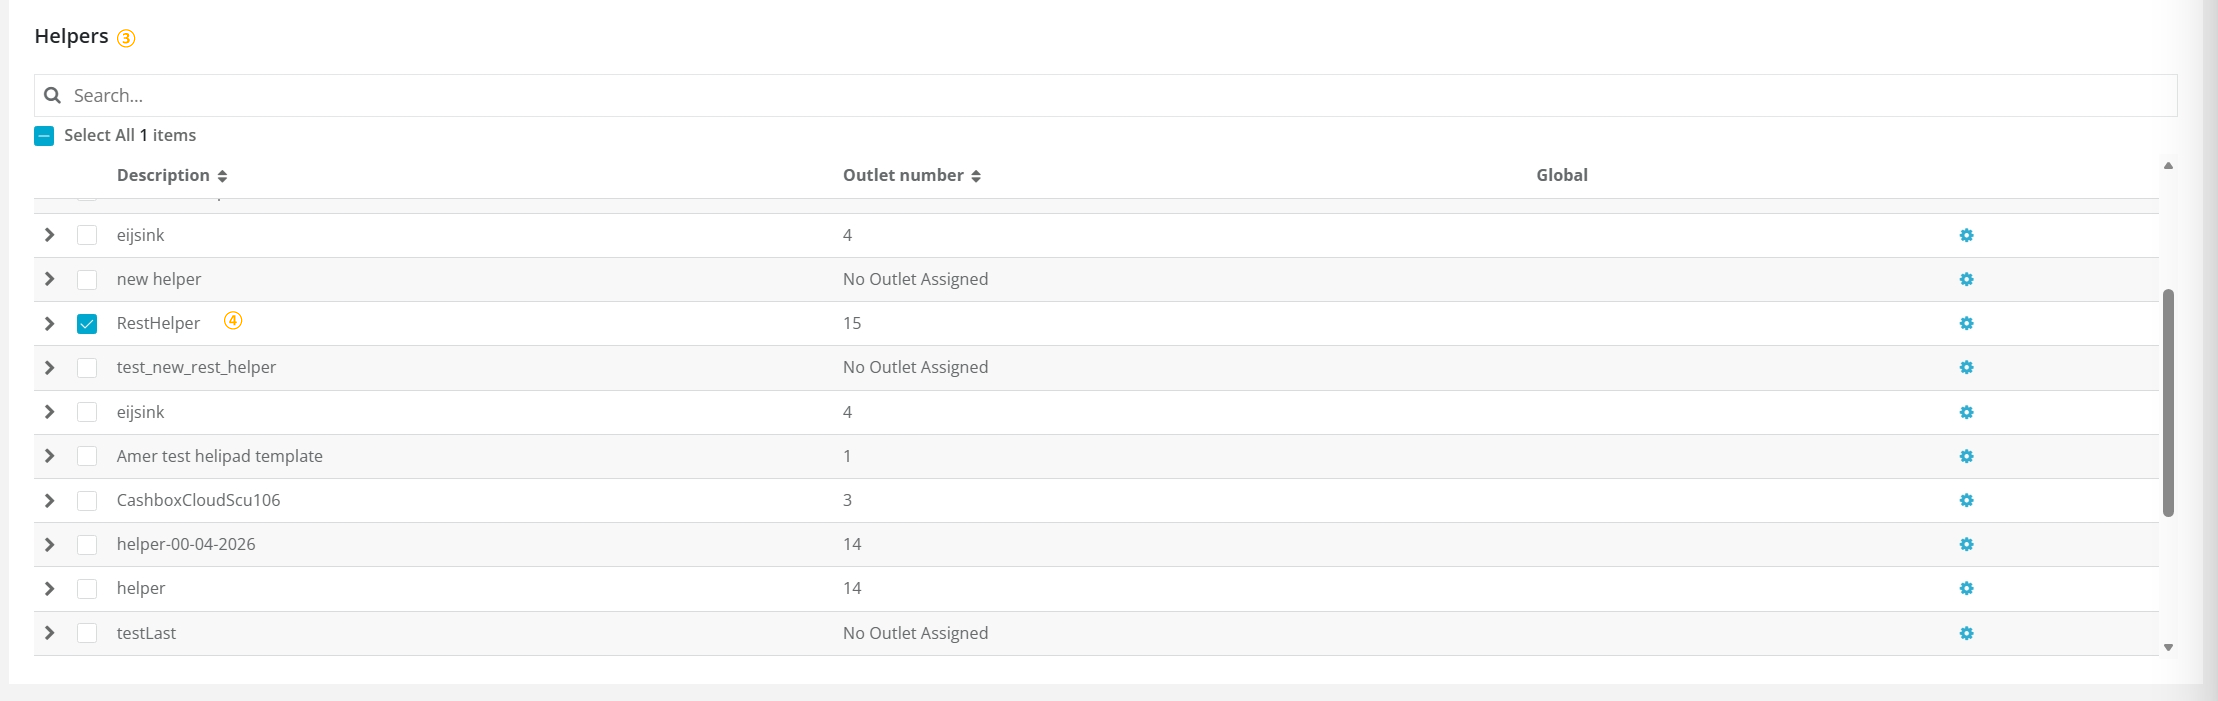
Figure 4. Helpers section of the CashBox configuration; steps are listed in Table 4.
| Steps | Description |
|---|---|
| Scroll down to the Helpers section and locate the LocalPosSystemApi Helper. |
| Activate the Helper by selecting its checkbox. |
Table 4. Steps to activate the LocalPosSystemApi Helper in the CashBox, as shown in Figure 4.
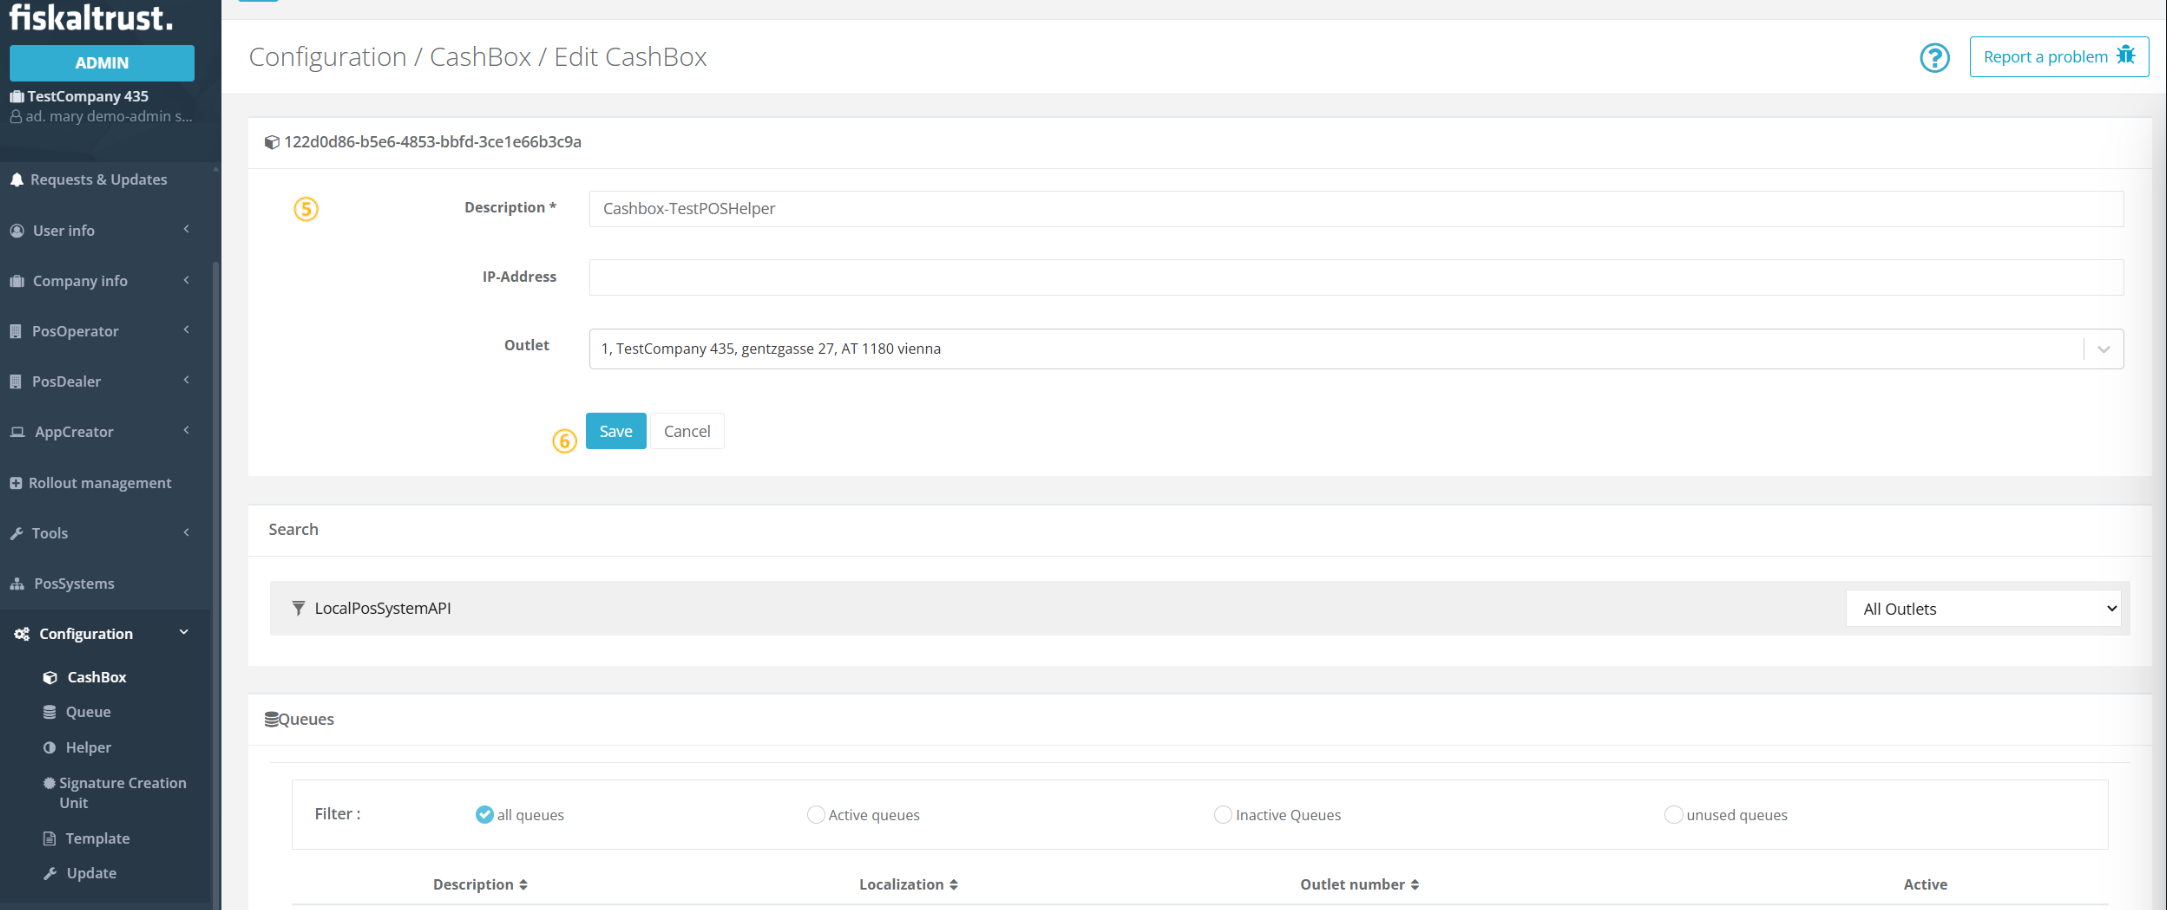
Figure 5. Saving the CashBox configuration after activating the Helper; steps are listed in Table 5.
The same LocalPosSystemApi Helper can be used in multiple cashboxes.
| Steps | Description |
|---|---|
| Scroll back to the top of the page. |
| Click Save to sabe your configuration. |
Table 5. Steps to save the CashBox configuration, as shown in Figure 5.
Download Launcher
The minimum required Launcher version is 2.0.0-rc.25. When downloading a launcher the latest version is downloaded automatically.
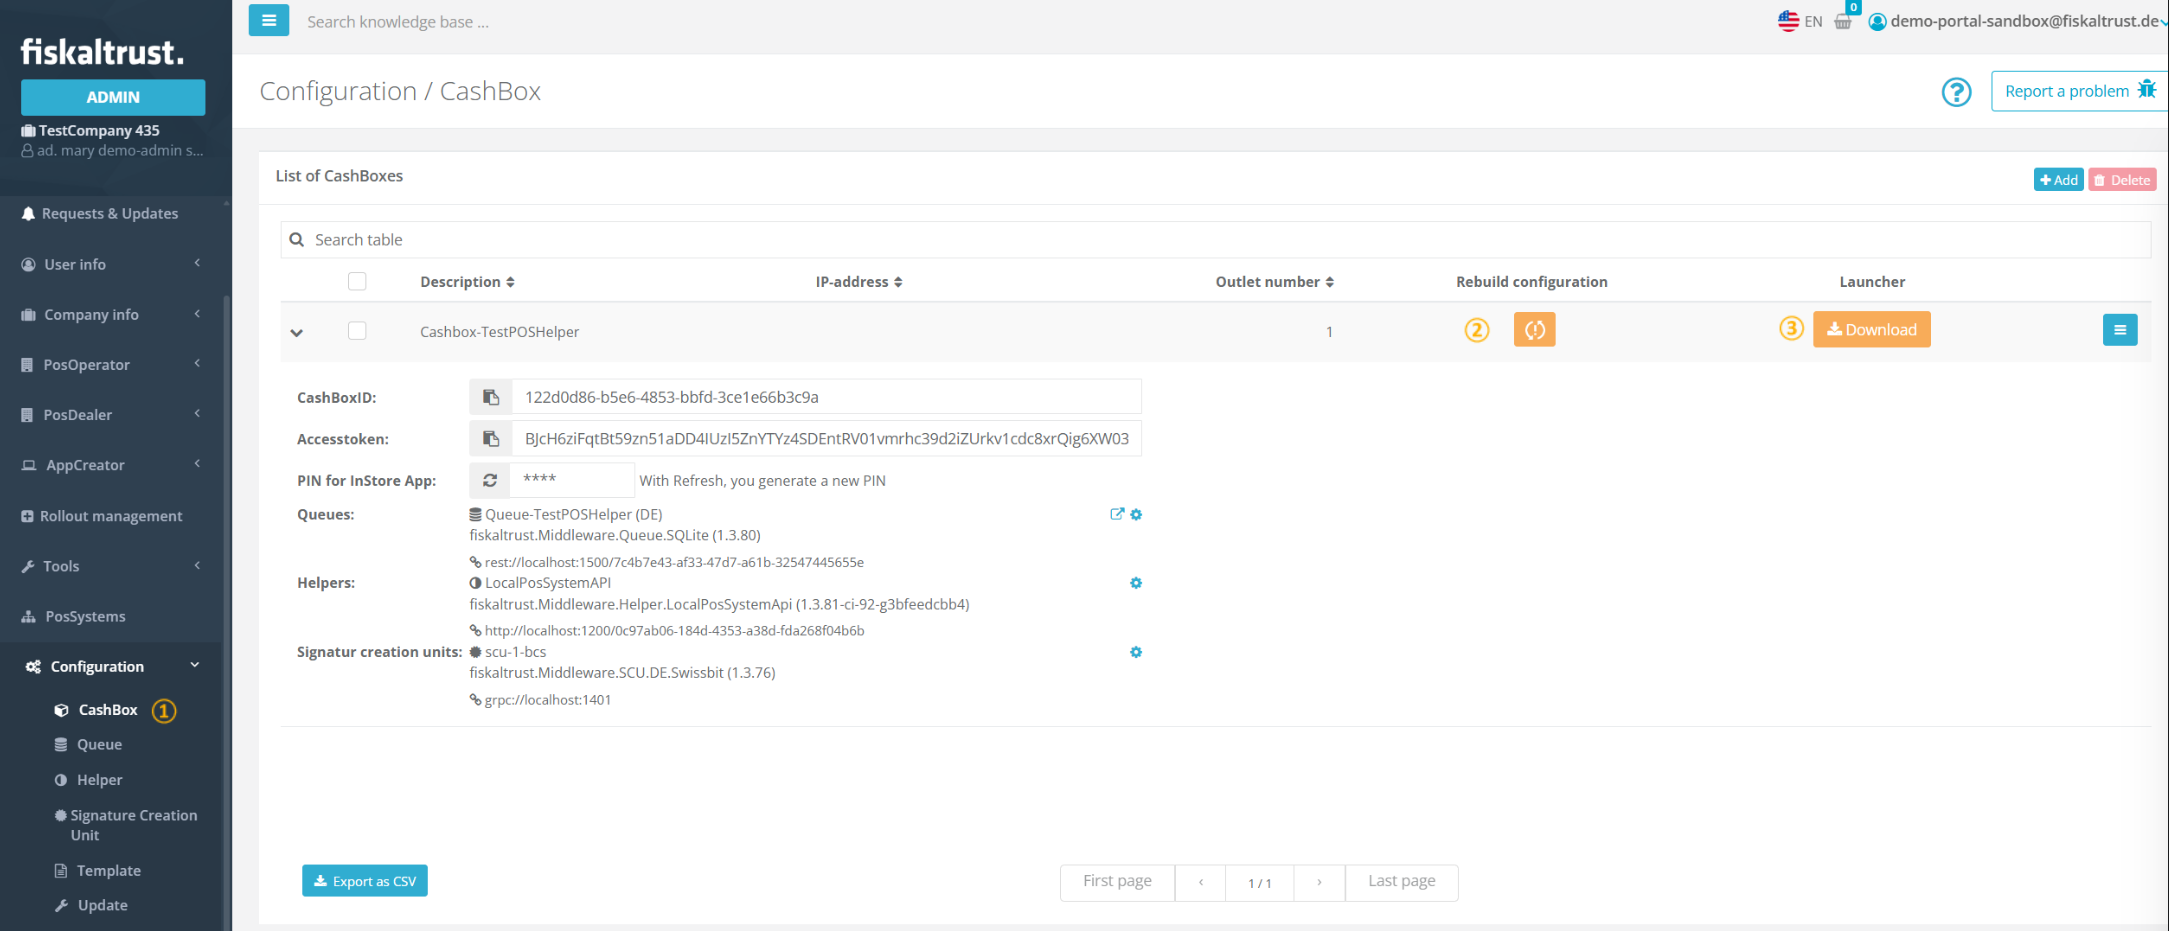
Figure 6. Configuration / CashBox page showing the configured Helper URL and Launcher download; steps are listed in Table 6.
| Steps | Description |
|---|---|
| Return to the Configuration / CashBox page. You should see the Helper URL configured in the previous step. |
| Click Rebuild configuration and wait for the success confirmation. |
| Click Download and select the appropriate Version 2 Launcher architecture for your system. |
Table 6. Steps to rebuild the configuration and download the Launcher 2.0, as shown in Figure 6.
Deploy the CashBox
Once the Launcher package is downloaded, extract it and run launcher-test.cmd (or launcher-test.sh on unix based systems) to start the Middleware. For detailed instructions on starting the Launcher and installing it as a service, see Launcher 2.0 Getting Started.
Test the LocalPosSystemApi Helper
Once the Middleware is running, verify that the LocalPosSystemApi Helper is working correctly by sending a test request. The easiest way to do this is by using the fiskaltrust Developer Portal, which provides an interactive interface for sending requests to the Middleware and inspecting the responses.
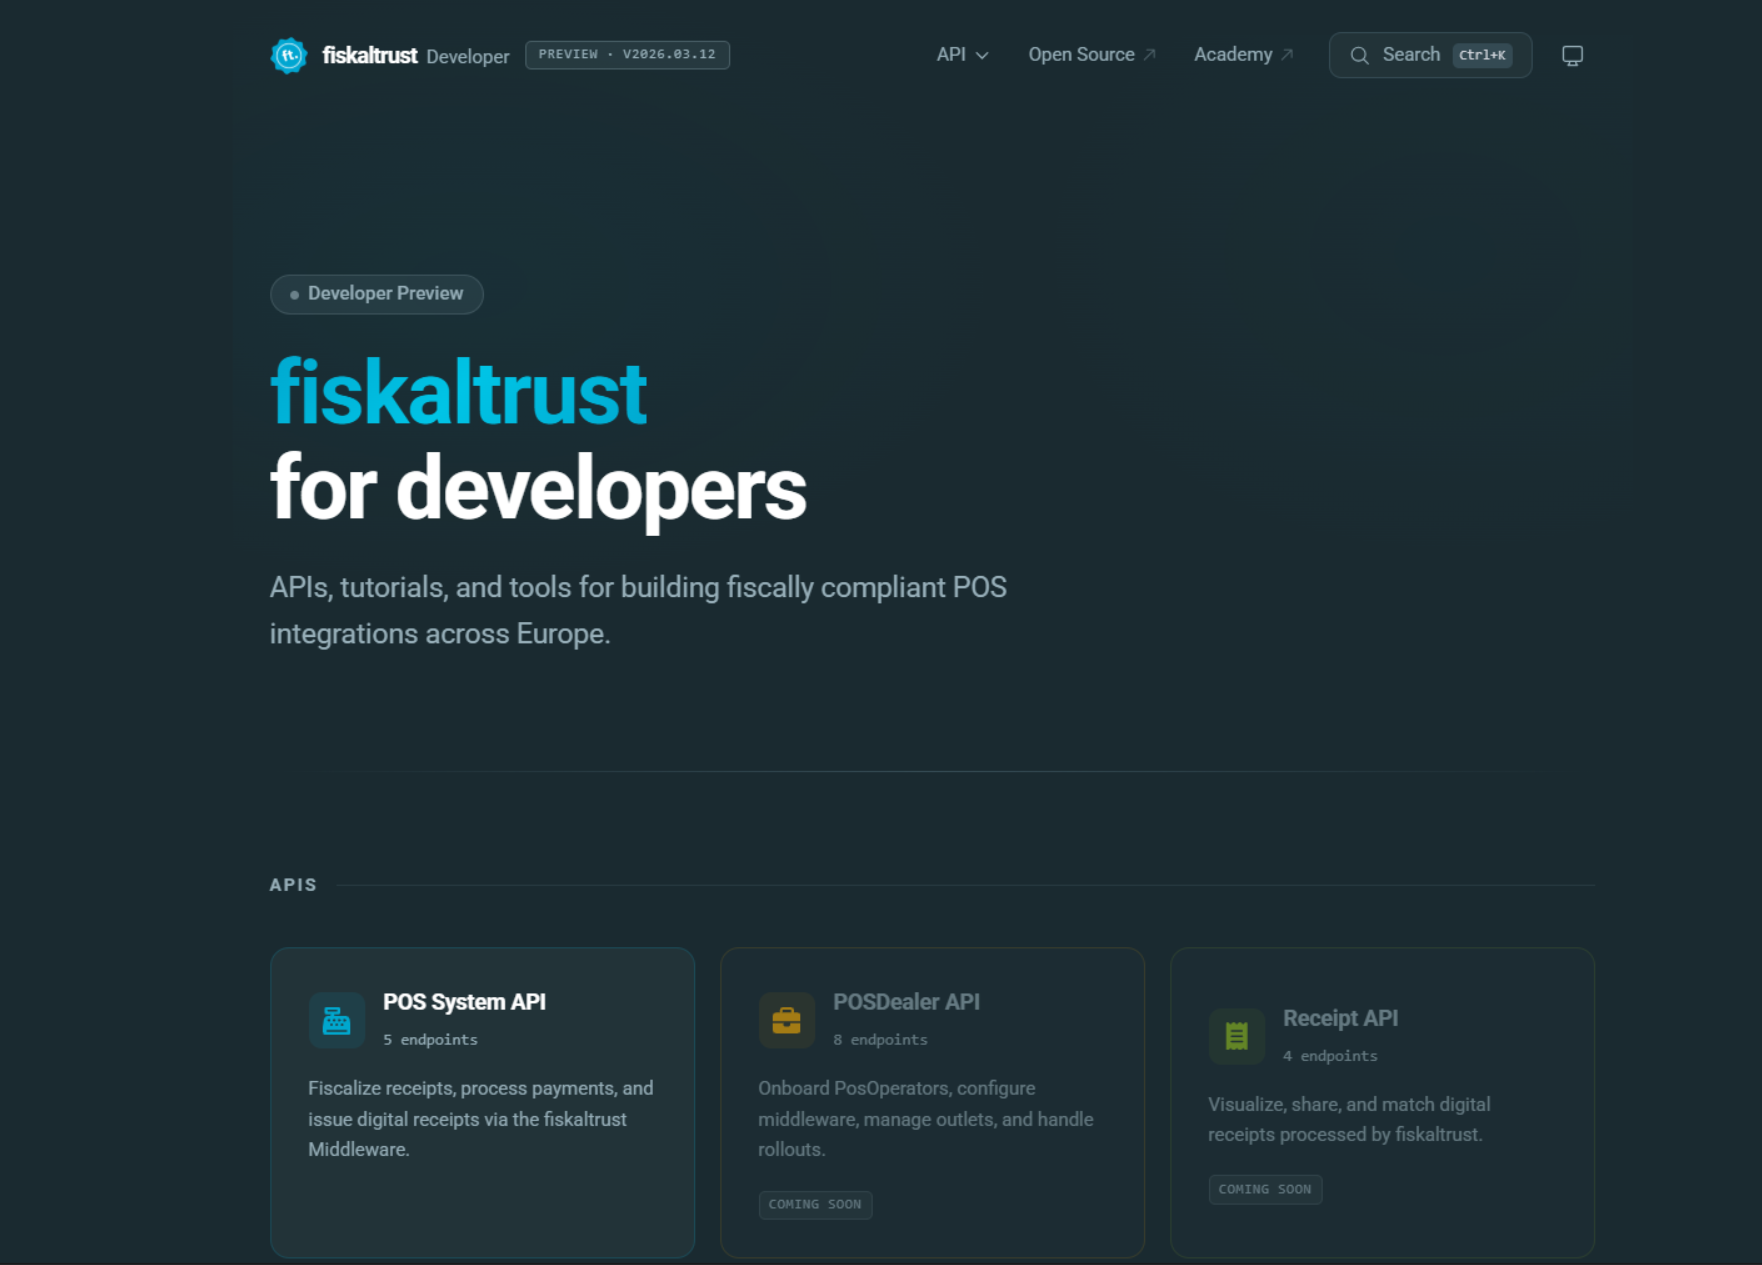
Figure 7. Landing page of the fiskaltrust Developer Portal listing the available APIs.
Select POS System API from the available options.
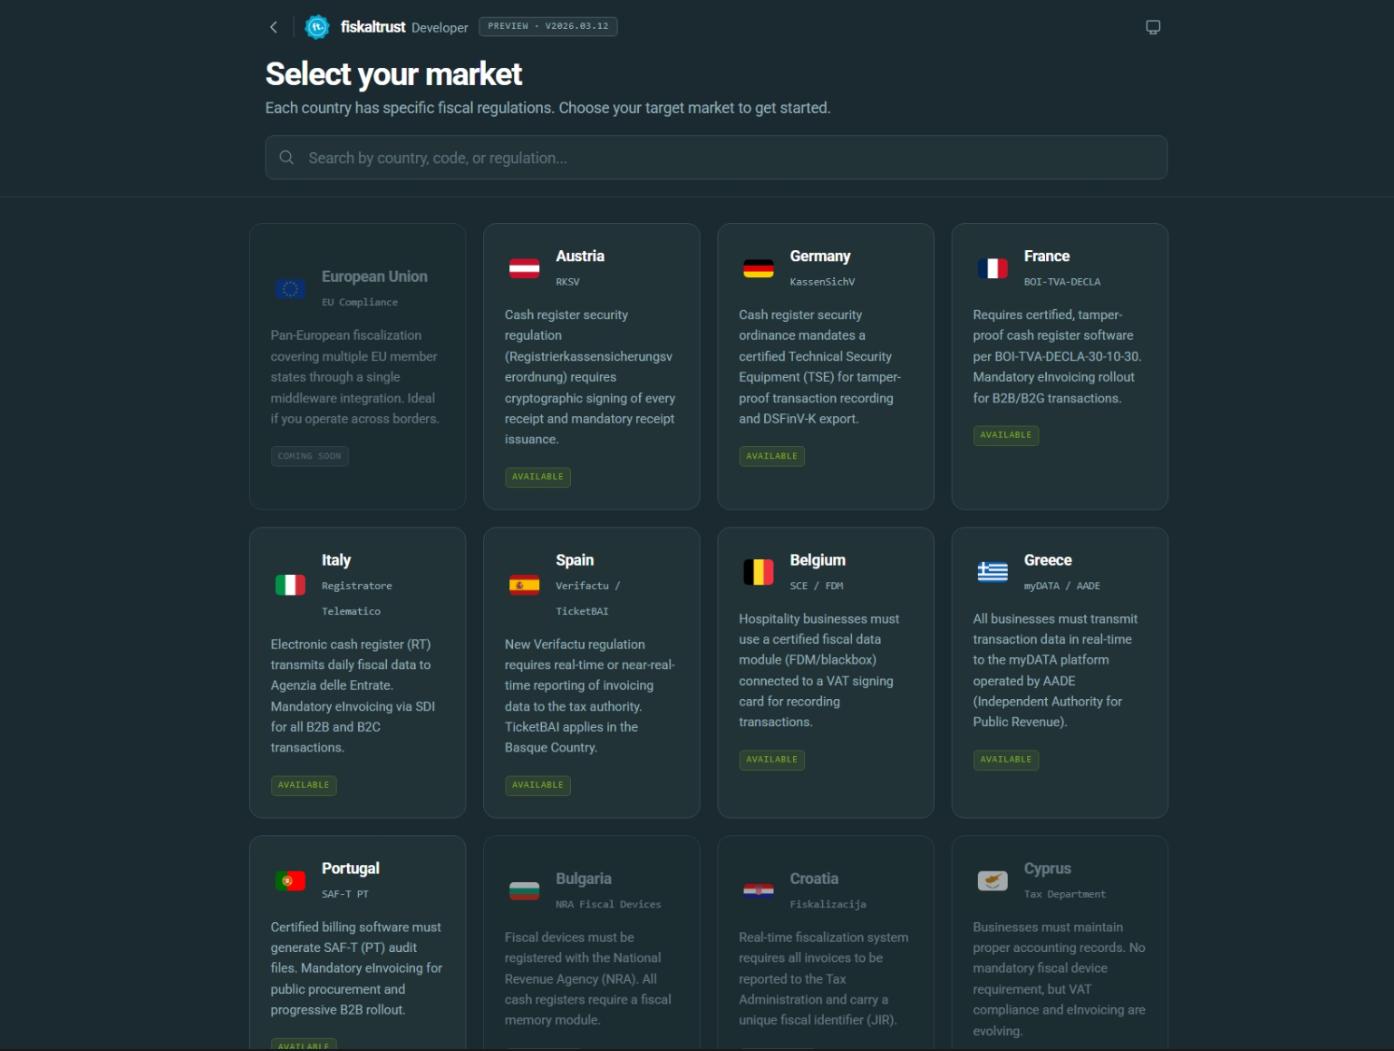
Figure 8. Market selection in the POS System API view of the Developer Portal.
Select your market.
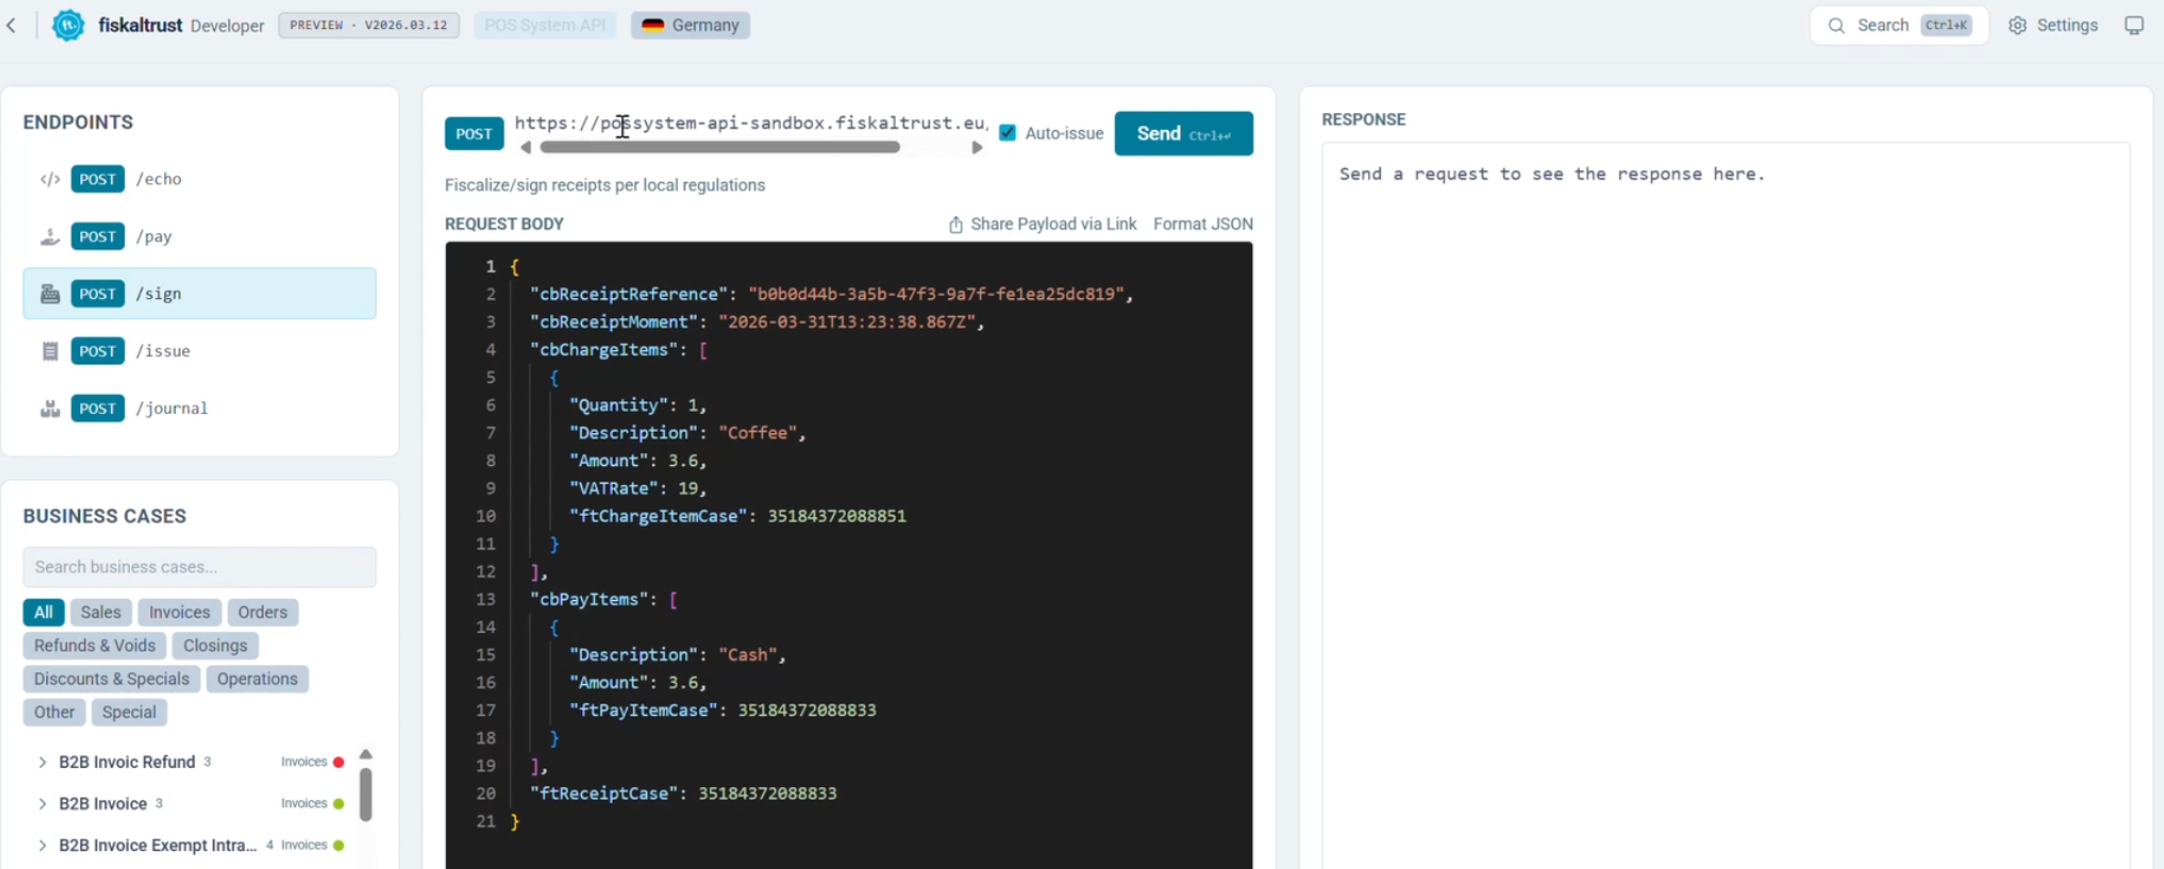
Figure 9. Settings button in the top-right corner of the Developer Portal.
Click Settings in the top-right corner.
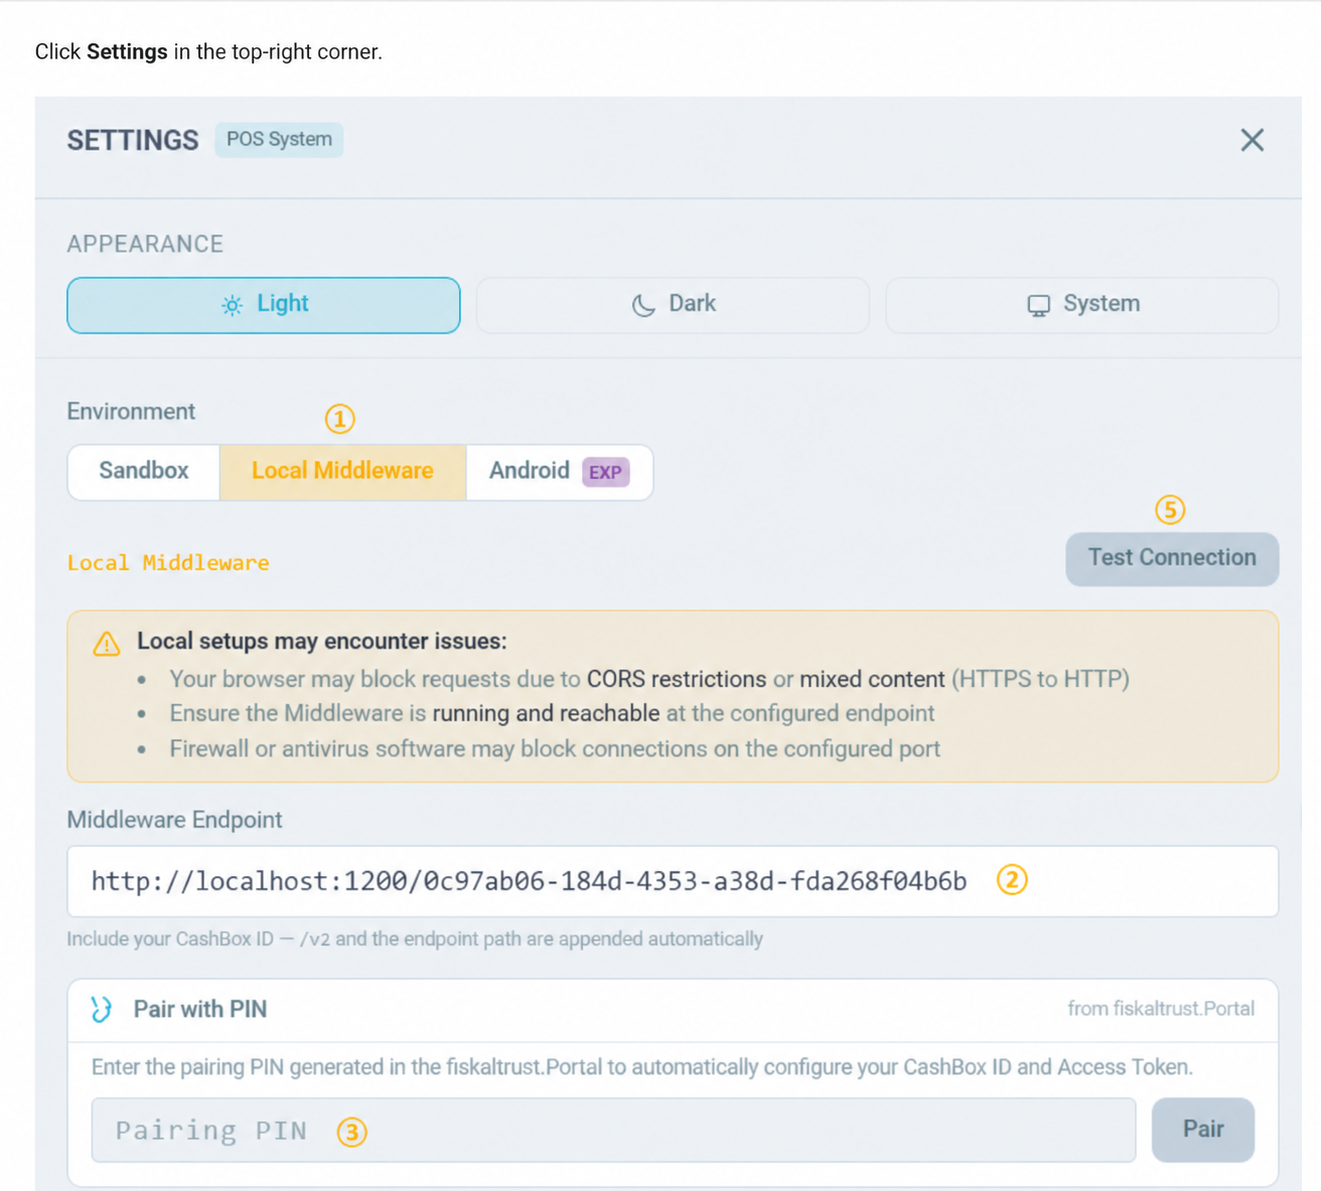
Figure 10. Settings dialog for pointing the Developer Portal at the local Middleware; steps are listed in Table 7.
| Steps | Description |
|---|---|
| In the Environment section, select Local Middleware. |
| In the Middleware Endpoint field, enter the Helper URL found on the Configuration / CashBox page. |
| Copy the PIN from the Configuration / CashBox page, enter it in the field below, then click Pair. A confirmation message should appear as shown below. |
Table 7. Steps to configure the local Middleware endpoint and pair the Developer Portal, as shown in Figure 10.

Figure 11. Confirmation message shown after successfully pairing with the local Middleware; steps are listed in Table 8.
| Steps | Description |
|---|---|
| The CashBox ID and Access Token fields are populated automatically. |
| Click Test Connection — a green 201 response confirms that the Helper is working correctly. |
Table 8. Steps to verify the connection to the local Middleware, as shown in Figure 11.
Close Settings. You can now use the available endpoints to send requests to the Middleware and verify the Helper functionality.
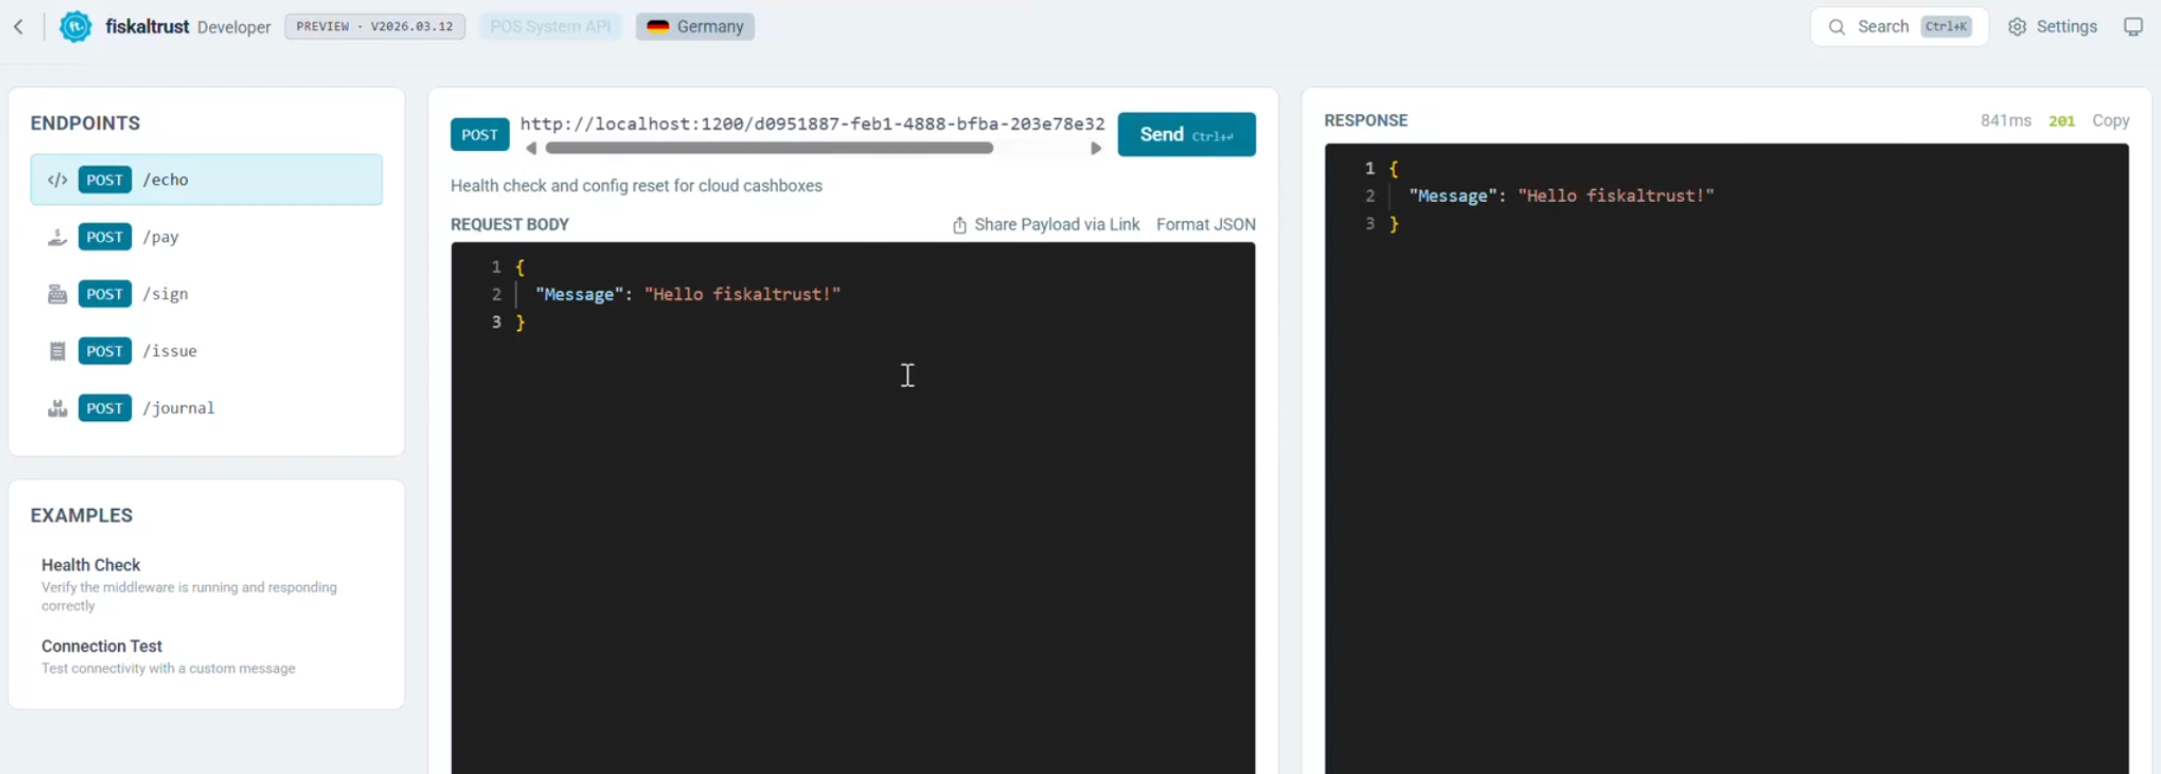
Figure 12. Available POS System API endpoints in the Developer Portal for sending requests to the Middleware.