Configuration
The Portal manual is no longer maintained. For the latest documentation, please refer to the PosDealer or PosCreator section of this site.
In case of any questions, we encourage you to refer to our current fiskaltrust Documentation Platform.
For further details, check the corresponding Knowledge Base Articles (KBA), which can be found on the fiskaltrust.Portal.
Before starting with the configuration, the master data of the enterprise and the outlet has to be completed and checked. For this see chapter Master data and Outlets
CashBox
Creation of a CashBox
 Creating the configuration containers
By opening the menu Configuration![]() and clicking on CashBox
and clicking on CashBox![]() the overview of all configured CashBoxes (configuration containers) is shown.
Click on [+ Add]
the overview of all configured CashBoxes (configuration containers) is shown.
Click on [+ Add]![]() to create a new configuration container.
to create a new configuration container.
Add a CashBox
 Configuration container - Add
![]() In this field, you can change the name of the configuration container. It should be unique so a CashBox can be identified in even a long list.
In this field, you can change the name of the configuration container. It should be unique so a CashBox can be identified in even a long list.
![]() If you are working in a network mode, enter the IP address of the endpoint here.
If you are working in a network mode, enter the IP address of the endpoint here.
![]() Click on [Save] to save the changes to the configuration container ad go back to the overview.
Click on [Save] to save the changes to the configuration container ad go back to the overview.
![]() Clicking [Cancel] cancels the operation without saving the changes and show the overview.
Clicking [Cancel] cancels the operation without saving the changes and show the overview.
Overview first CashBox
 Overview - First configuration container
![]() After creating a CashBox, it is initially empty, it only has the CashBoxID and the AccessToken which are required to access the CashBox. It can be seen by opening the information section by clicking on the chevron on the beginning of the line.
After creating a CashBox, it is initially empty, it only has the CashBoxID and the AccessToken which are required to access the CashBox. It can be seen by opening the information section by clicking on the chevron on the beginning of the line.
![]() This area shows all the assigned queues, helpers and SCUs for the configuration container. Since the CashBox has just been created and nothing is stored yet, the fields are empty.
This area shows all the assigned queues, helpers and SCUs for the configuration container. Since the CashBox has just been created and nothing is stored yet, the fields are empty.
![]() By clicking on
By clicking on ![]() you can download the dotnet Launcher. This must be used if there is an internet connection to the POS-System.
you can download the dotnet Launcher. This must be used if there is an internet connection to the POS-System.
![]() The dotnet useOffline Launcher should be used if no internet connection can be established. This can be downloaded by clicking on
The dotnet useOffline Launcher should be used if no internet connection can be established. This can be downloaded by clicking on ![]() .
.
![]() For using the fiskaltrust.Middleware with a MacOS or Linux system the mono useOffline Launcher is needed. It can be downloaded by clicking on
For using the fiskaltrust.Middleware with a MacOS or Linux system the mono useOffline Launcher is needed. It can be downloaded by clicking on ![]() . This is set to useOffline by default.
. This is set to useOffline by default.
![]() The CashBox can be edited with a click on
The CashBox can be edited with a click on ![]() by Drag & Drop.
by Drag & Drop.
![]() The CashBox can also be edited in a list view by clicking on
The CashBox can also be edited in a list view by clicking on ![]() .
.
![]() By clicking on
By clicking on ![]() an empty configuration container can be deleted.
an empty configuration container can be deleted.
Edit CashBox by Drag & Drop
 Edit CashBox by Drag & Drop
![]() The first widget shows all the created queues in this account. This corresponds to a data acquisition protocol and therefore a POS-System.
The first widget shows all the created queues in this account. This corresponds to a data acquisition protocol and therefore a POS-System.
![]() The second widget shows all created Helpers, which can be used in a CashBox. For further information see chapter Helpers.
The second widget shows all created Helpers, which can be used in a CashBox. For further information see chapter Helpers.
![]() The last widget contains all the SCUs created in this account and can be used in a CashBox, further information can be found in chapter Signature creation unit.
The last widget contains all the SCUs created in this account and can be used in a CashBox, further information can be found in chapter Signature creation unit.
A SCU must not be directly associated to a CashBox. Because the configuration container has a connection to the outlet and the SCU is coupled to an outlet, a loose coupling exists between them. It is essential for legal compliance to use the same outlet number in the SCU-configuration and the CashBox-configuration.
This loose coupling enables the usage of a single SCU for more than one queue in the same outlet.
![]() The field Outlet is mandatory and must contain the number of a valid outlet. For further information see chapter Outlets.
The field Outlet is mandatory and must contain the number of a valid outlet. For further information see chapter Outlets.
![]() This field contains the active CashBox. Using Drag & Drop, units from the three widgets on the right side can be integrated in this CashBox.
This field contains the active CashBox. Using Drag & Drop, units from the three widgets on the right side can be integrated in this CashBox.
Clicking on [Save] stores the changes to the configuration container.
Edit CashBox by List
Furthermore, the CashBox can be edited via a list.
 Edit CashBox by list
![]() The list view is divided into three sections showing the available objects (Queues, Helper, Signature Creation Unit).
The list view is divided into three sections showing the available objects (Queues, Helper, Signature Creation Unit).
![]() The required objects can be added to the cashbox by ticking the checkbox at the beginning of the row.
The required objects can be added to the cashbox by ticking the checkbox at the beginning of the row.
![]() Click
Click ![]() on the ending of a row to display the settings for each object.
on the ending of a row to display the settings for each object.
![]() Each Queue owns a certificate from a SCU for signing all the data send to it. With the button
Each Queue owns a certificate from a SCU for signing all the data send to it. With the button ![]() the certificate of a assigned SCU can be downloaded and verified.
the certificate of a assigned SCU can be downloaded and verified.
![]() For filtering all the tables/sections in this window at least 3 characters have to be entered.
For filtering all the tables/sections in this window at least 3 characters have to be entered.
Ready configured CashBox
 Ready configured CashBox
![]() By clicking on [+ Add] you can create a new configuration container (CashBox).
By clicking on [+ Add] you can create a new configuration container (CashBox).
![]() In the section Queues the deposited POS-System identification number (CashBoxID) as well as the automatically generated AES-key (Base64 encryption) (AccessToken) can be found.
In the section Queues the deposited POS-System identification number (CashBoxID) as well as the automatically generated AES-key (Base64 encryption) (AccessToken) can be found.
By clicking on ![]() the configuration of the queue can be edited.
the configuration of the queue can be edited.
![]() In this section the connected helpers as well as the package name and version is shown. By clicking on
In this section the connected helpers as well as the package name and version is shown. By clicking on ![]() each helper can be configured in its own window.
each helper can be configured in its own window.
![]() The connected signature creation units can be displayed here. But it is not necessary to connect a CashBox one-to-one to a SCU. Because a SCU can be used more than once for an outlet there is a loose connection between SCU and CashBox.
The connected signature creation units can be displayed here. But it is not necessary to connect a CashBox one-to-one to a SCU. Because a SCU can be used more than once for an outlet there is a loose connection between SCU and CashBox.
Delete a CashBox
For legal reasons it is currently not possible to delete a CashBox. However, there is one exception, that if the CashBox was not yet in use and is completly empty, it can still be deleted.
Before deleting a CashBox it has to be ensured that all elements from the configuration container are removed. Removing the element from the CashBox does not delete them, they are only put back in the general section for further use.
If a CashBox is not empty it can not be deleted.
By deleting a CashBox only the wrapping configuration container gets removed from the system. No data, certificate, queue, archives or anything else is touched or deleted.
 Delete CashBox
Download Launcher
 Download Launcher
![]() By clicking on one of these buttons, the launcher needed for commissioning is downloaded. This is a ZIP file that you download into the download folder. The zip-file can be founded in the local download-folder and extracted there for further use on a POS-System.
Be aware, that after changement in the configuration the [Rebuild]-button should be click before a launcher is downloaded.
By clicking on one of these buttons, the launcher needed for commissioning is downloaded. This is a ZIP file that you download into the download folder. The zip-file can be founded in the local download-folder and extracted there for further use on a POS-System.
Be aware, that after changement in the configuration the [Rebuild]-button should be click before a launcher is downloaded.
For further information see chapter Overview first CashBox
Queue
 Overview of queues
To get to the creation and Configuration![]() of a queue, click on the menu item Queue
of a queue, click on the menu item Queue![]() .
.
To find a specific queue, a text can be entered in the search field![]() . Starting with the second entered character, the table beneath gets filtered automatically.
. Starting with the second entered character, the table beneath gets filtered automatically.
A click on the button + Create new![]() adds a new queue to the account.
adds a new queue to the account.
Add a queue
 Queue - Adding
![]() This field, holds the name of the queue. It can be anything which helps to identify each single queue in the account.
This field, holds the name of the queue. It can be anything which helps to identify each single queue in the account.
![]() The appropriate storage method depending on your operating system can be selected. This value cannot be changed after the creation of the queue.
The appropriate storage method depending on your operating system can be selected. This value cannot be changed after the creation of the queue.
![]() The package version can also be selected using a dropdown menu. For updating the package version a click on
The package version can also be selected using a dropdown menu. For updating the package version a click on ![]() is mandatory.
is mandatory.
To configure the POS-System with a law compliant fiskaltrust.Middleware the correct package has to be selected. The certified version for the used POS-System, is written on the certificate. Your PosDealer or PosCreator knows which version is certified and must be used.
![]() Sets a timeout in milliseconds for the connection attempt with the signature creation unit.
Sets a timeout in milliseconds for the connection attempt with the signature creation unit.
![]() The country in which the queue is used can be selected in this dropdown list. This value can not be changed after creation of the queue.
The country in which the queue is used can be selected in this dropdown list. This value can not be changed after creation of the queue.
For a law compliant configuration France (FR) has to be chosen.
![]() This identification value has to be unique in the account. This value can not be changed after creation of the queue.
This identification value has to be unique in the account. This value can not be changed after creation of the queue.
![]() The [Save]-button creates the queue and stores it.
The [Save]-button creates the queue and stores it.
Queue configuration
The configuration has to be done directly after the creation of a queue. Nevertheless it can be changed afterwards with the ![]() button in the queue overview.
button in the queue overview.
 Queue configuration
![]() This box can be ticked to activate the verification of the connected certificate.
This box can be ticked to activate the verification of the connected certificate.
![]() Activating this option speeds up the signing of the first certificate, but slows down the queue starting.
Activating this option speeds up the signing of the first certificate, but slows down the queue starting.
![]() This line gives the possibility to add a key-value-pair to the configuration of the queue.
This line gives the possibility to add a key-value-pair to the configuration of the queue.![]() The
The ![]() button adds another line for a new pair and the
button adds another line for a new pair and the ![]() button removes the line from the configuration.
button removes the line from the configuration.
![]() The name of the queue can be changed in this field.
The name of the queue can be changed in this field.
![]() The type of storage can only be defined upon queue creation and can not be changed later on.
The type of storage can only be defined upon queue creation and can not be changed later on.
![]() The package version can also be selected using a dropdown menu. For updating the package version a click on
The package version can also be selected using a dropdown menu. For updating the package version a click on ![]() is mandatory.
is mandatory.
To configure the POS-System with a law compliant fiskaltrust.Middleware the correct package has to be selected. The certified version for the used POS-System, is written on the certificate. Your PosDealer or PosCreator knows which version is certified and must be used.
![]() The URL to access the queue can be defined in this field. By clicking on
The URL to access the queue can be defined in this field. By clicking on ![]() a URL is used, which is suitable for local use without internet connection, because no firewall settings are required. By clicking on
a URL is used, which is suitable for local use without internet connection, because no firewall settings are required. By clicking on ![]() , the system generates a URL with which the POS-System can access the queue. The URL can be renamed, to have it like this: http://localhost:1200/Queuefiskaltrust.
, the system generates a URL with which the POS-System can access the queue. The URL can be renamed, to have it like this: http://localhost:1200/Queuefiskaltrust.
The ![]() button adds another line for a new URL and the
button adds another line for a new URL and the ![]() button removes the URL from the configuration.
button removes the URL from the configuration.
![]() [Save] or [Save and close] saves the configuration of the queue (and closes the configuration module).
[Save] or [Save and close] saves the configuration of the queue (and closes the configuration module).
Queue overview
By opening the Queue-Module in the Configuration-menu an overview from all created queues are shown.
 Queue overview
![]() Clicking on the chevron right shows the base information for this queue and the used CashBox, if already configured.
Clicking on the chevron right shows the base information for this queue and the used CashBox, if already configured.
![]() This column shows the localisation (for which country the queue is used) and the CashBox identification.
This column shows the localisation (for which country the queue is used) and the CashBox identification.
![]() The third column contains a checkmark
The third column contains a checkmark ![]() when the queue is activated. A start receipt has been sent and the queue is ready to sign and chain receipts or already contains some receipts.
when the queue is activated. A start receipt has been sent and the queue is ready to sign and chain receipts or already contains some receipts.
If this column is empty no start receipt has been sent or a stop receipt was sent and the queue does not accept any receipts for chaining and signing.
![]() A queue contains two type of journals. Both of them are chained and secured against changes and contain already transmitted receipts.
A queue contains two type of journals. Both of them are chained and secured against changes and contain already transmitted receipts.
By clicking on ![]() all transmitted receipts are displayed in a list, see chapter ReceiptJournal of a queue.
all transmitted receipts are displayed in a list, see chapter ReceiptJournal of a queue.
By clicking on ![]() all important actions and status changes of the queue are shown in a list, see chapter ActionJournal of a queue.
all important actions and status changes of the queue are shown in a list, see chapter ActionJournal of a queue.
![]() To stop the transmission from the local POS-System to the queue the
To stop the transmission from the local POS-System to the queue the ![]() button can be clicked. Starting from this moment the queue does not save any receipt in the cloud. With
button can be clicked. Starting from this moment the queue does not save any receipt in the cloud. With ![]() the queue receives all the untransmitted receipts from the moment the button is clicked. This can be take several days because the check for missing receipts is started by the first receipt saved in the local queue.
the queue receives all the untransmitted receipts from the moment the button is clicked. This can be take several days because the check for missing receipts is started by the first receipt saved in the local queue.
![]() The queue export can be started by pressing the button
The queue export can be started by pressing the button ![]() . For further information see chapter Export a queue.
. For further information see chapter Export a queue.
![]() The last column contains the commands to manage a queue.
The last column contains the commands to manage a queue.
By clicking on ![]() the connected SCUs can be displayed and managed. For further information see chapter SCUs used by a queue.
the connected SCUs can be displayed and managed. For further information see chapter SCUs used by a queue.
Here the configuration of the queue can be opened by clicking on ![]() , see Configure a queue.
, see Configure a queue.
Clicking on ![]() edits the description, package version and timeout of the queue, see Edit a queue.
edits the description, package version and timeout of the queue, see Edit a queue.
Clicking on ![]() deletes the queue. However, the button for deleting the queue is inactive for legal reasons, so no queue can be deleted after creation. The possibility to delete a queue does not depend on the status or the content of a queue. Once created no deletion is possible.
deletes the queue. However, the button for deleting the queue is inactive for legal reasons, so no queue can be deleted after creation. The possibility to delete a queue does not depend on the status or the content of a queue. Once created no deletion is possible.
 Filter the list of queues
With a large list of configured queues the overview can be hard. For this the view can be filtered by status of the queue by a click on the corresponding radio button.
SCUs used by a queue
 Queue - Connected Signature Creation Devices (SCU)
![]() By setting a check mark the SCU to be connected to the queue is selected.
By setting a check mark the SCU to be connected to the queue is selected.
![]() The SIRET of the attached outlet to the SCU is shown.
The SIRET of the attached outlet to the SCU is shown.
![]() Shows the serial number of the certificate used by this SCU.
Shows the serial number of the certificate used by this SCU.
![]() With the button
With the button ![]() the certificate of the SCU can be downloaded.
the certificate of the SCU can be downloaded.
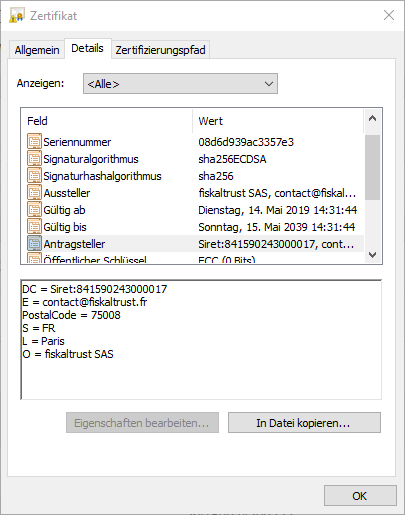 Detail of a certificate
The content of the certificate can verified with a double click on it.
Edit a Queue
 Edit a queue
![]() The name of the queue can be changed with this field.
The name of the queue can be changed with this field.
![]() Various package versions can be selected by using the drop-down menu. These can be updated by clicking on
Various package versions can be selected by using the drop-down menu. These can be updated by clicking on ![]() . To take this change in effect on the POS-Systems, this has to be restarted.
. To take this change in effect on the POS-Systems, this has to be restarted.
To configure the POS-System with a law compliant fiskaltrust.Middleware the correct package has to be selected. The certified version for the used POS-System, is written on the certificate. Your PosDealer or PosCreator knows which version is certified and must be used.
![]() Sets a timeout in milliseconds for the connection attempt with the signature creation unit.
Sets a timeout in milliseconds for the connection attempt with the signature creation unit.
All other values shown on the page are read-only and cannot be changed. This value shows the current state of the queue and the saved counters of the different receipt types.
At the bottom of the page the buttons [Save] or [Save and close] saves the configuration of the queue (and closes the configuration module).
ReceiptJournal of a Queue
 Queue - Overview ReceiptJournal
This journal shows all receipt created by a POS-System connected to the fiskaltrust.Middleware. All special receipt types like a closure receipt, an archive request or warnings are shown in the ActionJournal.
![]() This dropdown limits the shown rows of a journal to 50, 100, 500 or a full list. If the journal is long, a full list can take some time to be shown.
This dropdown limits the shown rows of a journal to 50, 100, 500 or a full list. If the journal is long, a full list can take some time to be shown.
![]() This dropdown list defines the type of receipt shown.
This dropdown list defines the type of receipt shown.
![]() The first column shows the date/time the receipt was created.
The first column shows the date/time the receipt was created.
![]() Shows the overall counter of all receipts in the queue.
Shows the overall counter of all receipts in the queue.
![]() Shows the receipt number created by the fiskltrust.Service.
Shows the receipt number created by the fiskltrust.Service.
![]() The button
The button ![]() displays the respective receipt.
displays the respective receipt.
Detailed receipt
 Queue - Detailed receipt
After selecting a receipt, it is displayed as follows. This view makes it possible to verify the accuracy of the receipt content.
ActionJournal of a Queue
 Queue - Overview ActionJournal
This list shows all special receipt types of a queue. For regular receipts see ReceiptJournal. A click of the right chevron![]() opens the detailed view of the data of the receipt.
opens the detailed view of the data of the receipt.
Export a queue
 Queue - Overview Exports
An overview of all running and finished exports of the account can be seen in the menu Tools![]() and submenu Export
and submenu Export![]() .
.
![]() A line of the table represents an export. By clicking on the chevron on the right more details of the export can be shown. If the export finished successfully, a list of downloadable archives is shown.
A line of the table represents an export. By clicking on the chevron on the right more details of the export can be shown. If the export finished successfully, a list of downloadable archives is shown.
![]() By clicking on the filename this file is transfered from the fiskaltrust.Storage to the local system.
By clicking on the filename this file is transfered from the fiskaltrust.Storage to the local system.
![]() The column Formats shows all exported journals and formats as its own icon. For information regarding which format and/or journal is included in the export a tooltip is shown by each icon.
The column Formats shows all exported journals and formats as its own icon. For information regarding which format and/or journal is included in the export a tooltip is shown by each icon.
![]() In the third column the location of the files
In the third column the location of the files ![]() is shown or if the export is running
is shown or if the export is running ![]() .
.
![]() The column State shows information to the export. Until the export is finished no detailed information is given. After the export is finished, the chains and paths are shown. In the second line the user is informed if errors occurred or exist in the chain.
The column State shows information to the export. Until the export is finished no detailed information is given. After the export is finished, the chains and paths are shown. In the second line the user is informed if errors occurred or exist in the chain.
![]() In the last column the number of exported receipts are shown and which queue id is concerned.
In the last column the number of exported receipts are shown and which queue id is concerned.
![]() To create a new export a click on [+ Create new export] can be done. This function can be called directly with the button
To create a new export a click on [+ Create new export] can be done. This function can be called directly with the button ![]() from the queue configuration too, see chapter Queue overview.
from the queue configuration too, see chapter Queue overview.
Create a new export for a queue
 Create new export for a queue
![]() The first and the last receipt number for the export can be defined. By leaving the field open, the information about date and time will be shown at the end points of the slider
The first and the last receipt number for the export can be defined. By leaving the field open, the information about date and time will be shown at the end points of the slider![]() .
.
![]() The date and time for the first receipt to export can be defined. By leaving the field open, the information about date and time will be shown at the end point of the slider
The date and time for the first receipt to export can be defined. By leaving the field open, the information about date and time will be shown at the end point of the slider![]() .
.
![]() The date and time for the last receipt to export can be defined. By leaving the field open, the information about date and time will be shown at the start point of the slider
The date and time for the last receipt to export can be defined. By leaving the field open, the information about date and time will be shown at the start point of the slider![]() .
.
![]() The range of exported receipts can be adjusted by sliding the end points of the slider.
The range of exported receipts can be adjusted by sliding the end points of the slider.
![]() The drop area holds all the export formats, journals and storages for an export. It can be filled by dragging the elements on the right side, to this area.
The drop area holds all the export formats, journals and storages for an export. It can be filled by dragging the elements on the right side, to this area.
![]() Formats and journals available for an export.
Formats and journals available for an export.
The element Full export (xml) creates an archive in xml-format with all receipt types in the selected range. The export result at least two files. The file XML.fileid.full.xml contains all the archived receipts and the file XML.fileid.path#.xml contains the chain of the full journal. If there is more then one path in the queue, for each path a single xml-file is created.
All other elements create an archive of the mentioned receipt type. This archive is downloadable as zip-file and contains a single csv-file in plain text with the range of the exported receipts.
With a click on ![]() , the used filename can be changed.
, the used filename can be changed.
 Change filename of an archive to export
Each element from the format section can be used only once per export.
![]() This element defines the storage location of an export. This element can be used more than one time for an export. This offers the possibility to save an export in more than one place at the same time.
This element defines the storage location of an export. This element can be used more than one time for an export. This offers the possibility to save an export in more than one place at the same time.
The element Database to Azure-Storage exports the database to the used Azure-Storage.
With Azure-Storage another personal storage at Azure can be used to save the export. To use this element the access credentials have to be defined with a click on ![]() this element.
this element.
 Define credentials for the Azure Storage to save the export
The location element FTP-Server offers a ftp-transfer of the exported archives. This element can be used when the ftp-credentials are entered after a click on ![]() this element.
this element.
 Define credentials for a FTP-Server to save the export
All entered credentials are not saved from the fiskaltrust.Portal. They are only used once for saving the export in the defined location.
![]() The click on [Start export and close] queues the export and closes the window. The status of the export can be verified in the list of exports of the queue, see Export a queue.
The click on [Start export and close] queues the export and closes the window. The status of the export can be verified in the list of exports of the queue, see Export a queue.
Signature creation unit (SCU)
The SCU is the part of the fiskaltrust.Middleware for securing all the receipts sent to it. In France the SCU is the holder of the certificate to guarantee the unalterability, securtiy, conservation and archiving of the transmitted data.
Overview of signature creation units
 Overview - Signature Creation Units (SCU)
To find a specific SCU, a text can be entered in the search field![]() . Starting with the second entered character the table beneath gets filtered automatically.
. Starting with the second entered character the table beneath gets filtered automatically.
![]() Clicking on [+ Create] opens the module for creating a new signature creation unit, see Creation of a SCU.
Clicking on [+ Create] opens the module for creating a new signature creation unit, see Creation of a SCU.
![]() The SIRET used by the SCU is displayed here. This reflects the loose coupling of the SCU to the outlet, see for more information chapter Outlets.
The SIRET used by the SCU is displayed here. This reflects the loose coupling of the SCU to the outlet, see for more information chapter Outlets.
![]() Shows the serial number of the certificate of the SCU.
Shows the serial number of the certificate of the SCU.
![]() Each SCU holds a certificate for signing all the data send to it. With the button
Each SCU holds a certificate for signing all the data send to it. With the button ![]() the certificate of this SCU can be downloaded and verified.
the certificate of this SCU can be downloaded and verified.
![]() Click on
Click on ![]() to delete the SCU. However, the button to delete any signature creation unit is currently inactive for legal reasons, so no SCU can be deleted.
to delete the SCU. However, the button to delete any signature creation unit is currently inactive for legal reasons, so no SCU can be deleted.
Creation of a SCU
 Adding a signature creation unit
To create the signature creation unit, command Signature creation device![]() in the Configuration
in the Configuration![]() menu. A click on [+ Create] opens the page for adding a new SCU to the company.
menu. A click on [+ Create] opens the page for adding a new SCU to the company.
In the dropdown list all outlets of the company are shown. To create a SCU, an outlet has to be selected. It is not necessary to create more then one SCU for an outlet, but at least one per outlet has to be created. It is not possible to use one signature creation unit for more then one outlet because the SIRET of the selected outlet is used to created the certificate for each SCU.
Add signature creation unit
To connect a SCU to a CashBox or more specifically to a queue see Outlets andSCUs used by a queue
Delete a signature creation unit
The button for deleting a signature creation unit is, for legal reasons, inactive. No created SCU can be deleted from the fiskaltrust.Middleware. In the future there will be a filter to hide unused or inactive SCUs.
Template
 List of available templates
Instead of creating and configuring a CashBox manually, a template (payable or free of charge) can be used. This preconfigured template can be purchased in the fiskaltrust.Shop. With this kind of template many similar CashBoxes can be created easily and further used as described in the chapter CashBox.
If you are in need of templates for creating and configurating CashBoxes, do not hesitate to contact the support at contact@fiskaltrust.fr. fiskaltrust France is happy to help you to reach this goal.
The template management can be found in Configuration![]() at the command Template
at the command Template![]()
![]() In the first column the template name is shown. More information regarding the template will be shown after a click on the chevron right.
In the first column the template name is shown. More information regarding the template will be shown after a click on the chevron right.
![]() Shows the status of the template. It can be completely deactivated, visible for everyone or only for connected PosDealers and/or PosOperators.
Shows the status of the template. It can be completely deactivated, visible for everyone or only for connected PosDealers and/or PosOperators.
![]() A click on [+ Create new] creates a new template from scratch.
A click on [+ Create new] creates a new template from scratch.
![]() A click on
A click on ![]() clones the template and opens the newly created template for changes.
clones the template and opens the newly created template for changes.
![]() The button
The button ![]() opens the template for changes.
opens the template for changes.
Create template
 Create a template
The first two fields give the template a clear name and description. In the field Content the commands for this template are saved. This will be normally prefilled from the fiskaltrust.Support.
In ImageUrl an absolute URL to a kind of product image can be stored. For more description of this template an absolute URL can be entered in LinkUrl.
The dropdown list in Mode defines the access rights for a template by choosing one of the elements.
A template always start with
{ "ftCashBoxId": "|[cashbox_id]|",
"ftQueues": [{"Id": "|[queue0_id]|",
Then add queue type: "Package": "fiskaltrust.service.azure",
The type of packages can be found in the dropdown list of creating a new queue.
Then introduce queue parameters, anew block has to be started: "Configuration": {
For example a connection string can be included "connectionstring": "DefaultEndpointsProtocol=http://endpoint.cloud;AccountName=ftRealAccountName;AccountKey=TheACcountKey;",
or other queue parameter, like "asscdtretry": 2,
Then beginning of the queue core starts with
"init_ftQueue": [{ "ftQueueId": "|[queue0_id]|",
                   "ftCashBoxId": "|[cashbox_id]|",
                   "CountryCode": "FR",
                   "Timeout": 15000 }],
and the specific of the country
"init_ftQueueFR": [ { "ftQueueFRId": "|[queue0_id]|",
but also the queue name
"CashBoxIdentification": "ChaîneCloud|[count]|" } ],
then the SCU that this queues connect to:
"ftSignaturCreationUnitFRId": "|[scu0_id]|",
and the SIRET used for this queue:
"Siret": "|[siret]|",
To initialize a SCU for a queue the following block can be used:
"init_ftSignaturCreationUnitFR": [{
        "ftSignaturCreationUnitFRId": "|[scu0_id]|",
        "Siret": "|[siret]|",
        "CompanyName": "|[company_name]|",
        "CountryCode": "FR",
        "OutletNumber": "|[outlet_number]|"
    }
]
As last parameter the endpoint for the ChaîneCloud product has to be defined:
"Url": ["https://signaturcloud-azure-sandbox.fiskaltrust.fr/"]
Example of a standard template
{
    "ftCashBoxId": "|[cashbox_id]|",
    "ftQueues": [{
            "Id": "|[queue0_id]|",
            "Package": "fiskaltrust.service.azure",
            "Configuration": {
                "connectionstring": "|[signaturcloud-storage-connectionstring]|",
                "init_ftQueue": [{
                        "ftQueueId": "|[queue0_id]|",
                        "ftCashBoxId": "|[cashbox_id]|",
                        "CountryCode": "FR",
                        "Timeout": 15000
                    }
                ],
                "init_ftQueueFR": [{
                        "ftQueueFRId": "|[queue0_id]|",
                        "ftSignaturCreationUnitFRId": "|[scu0_id]|",
                        "Siret": "|[siret]|",
                        "CashBoxIdentification": "ChaîneCloud|[count]|"
                    }
                ],
                "init_ftSignaturCreationUnitAT": [],
                "init_ftSignaturCreationUnitFR": [{
                        "ftSignaturCreationUnitFRId": "|[scu0_id]|",
                        "Siret": "|[siret]|"
                    }
                ]
            },
            "Url": ["https://signaturcloud-azure-sandbox.fiskaltrust.fr/"]
        }
    ]
}
Systemvariables
| Variable | Data type | Value | Example |
|---|---|---|---|
cashbox_id | GUID | Random GUID | c2d68cbb-8963-4dda-84f2-9b28c9049b7b |
scu{0-9}_id | GUID | Random GUID | 2dc8896a-20ff-4a90-8020-008a9fc2d080 |
helper{0-9}_id | GUID | Random GUID | 72e0ef61-4d28-4bf1-acd3-e17e6ced5635 |
queue{0-9}_id | GUID | Random GUID | ebb8ab15-88ff-49b9-a8ff-c4fca02701cb |
count | int | Existing elements +1 | 5 |
Automating CashBox creation
The template system of fiskaltrust can be used for creating a large number of CashBoxes. There is one restriction: It cannot be used for creating CashBoxes with ChaîneCloud!
For this purpose, fiskaltrust provides an HTTP API which can be used in the sandbox (https://helipad-sandbox.fiskaltrust.cloud/api/configuration) but also in the live environment (https://helipad.fiskaltrust.cloud/api/configuration).
API-Call
Various requirements are necessary to call up the API.
- You need the
AccountIDand theAccessToken, which you can find in your company account (https://portal-sandbox.fiskaltrust.fr/AccountProfile) at the bottom of the page. - You need the SIRET, Company Name and Outlet-Number.
- The template as JSON string.
The request has to be send with the method POST with set to application/json. The header has to contain the variables accountid and accesstoken for which the template should be executed.
General information
Variables are identified by specifying them within |[ and ]|. It is possible to specify system variables whose values are generated by the fiskaltrust.System during generation as well as to specify your own variables whose values can be transferred later via an API call to generate the CashBox.
In first line of the following example, the system variable: |[cashbox_id]| is specified as the value for ftCashBoxId. This is the CashboxID, a value that is automatically generated by the system and used at this point to identify later the CashBox.
In the fifth line, on the other hand, a separate variable is used (|[siret]|) whose concrete value can be passed later during the API call.
Data structure
| Name | Data type | Mandatory Default | Description |
|---|---|---|---|
ftCashBoxId | GUID (string)GUID | yes | Identifies the CashBox in the fiskaltrust.System and must therefore be unique. Will later become part of the authentication of the CashBox. The system variable ` |
ftSignaturCreationDevices | PackageConfiguration[] | no | Array, contains the configurations of the SCUs to be used. |
helpers | PackageConfiguration[] | no | Array, contains the configurations of the Helpers to be used. |
ftQueues | PackageConfiguration[] | yes | Array, contains the configurations of the Queues to be used. |
TimeStamp | DateTime.UtcNow.Ticks | no | Time of creation of the template. |
Example
{
    "ftCashBoxId": "|[cashbox_id]|",
    "ftSignaturCreationDevices": [{}],
    "helpers": [{}],
    "ftQueues": [{}]
}
Standard variables for PackageConfiguration
With all PackageConfiguration-object the follwoing variables can be used. Depending on each object the possible values can differ.
| Name | Data type | Mandatory Default | Description |
|---|---|---|---|
Id | GUID (string)GUID | yes | Identifies the instance of the element that is configured here (SCU, Queue or Helper). A maximum of the instances can be used (queue{0-9}_id, scu{0-9}_id or helper{0-9}_id. |
Package | string | yes | Name of the package to be used to create the element. E. g. fiskaltrust.service.sqlite for a Queue that is installed locally. Currently supported packages can be found below. |
Description | string | no | Descriptive name of the element. Can only be changed be using it as a parameter in the query string. |
Version | stringlatest version | yes | Version of the package to be used to create the element. If no version is specified, the latest version is used. For France only defined versions are allowed for using with the Queue: 1.2.21138.42021 |
Configuration | Object (string) | no | Configuration parameters for the element. |
URL | string[]automatic | no | Array, communication endpoints of the element. E.g. REST endpoint for communication with the queue. The default value is http://localhost:1200/ and the GUID of the package. |
Available packages and version
| Type | Package name | Description | Version in FR |
|---|---|---|---|
| Queue | fiskaltrust.service.sqlite | An SQLite database is used as the local persistence layer. | 1.2.21138.42021 |
| Queue | fiskaltrust.service.sqlite.mono | An SQLite database for mono is used as the local persistence layer. | 1.2.21103.40594 |
| Queue | fiskaltrust.service.ef | Entity framework is used as the local persistence layer. | 1.2.21138.42021 |
| Queue | fiskaltrust.service.azure | An Azure instance is used as the local persistence layer. | n/a |
| Queue | fiskaltrust.service.adonet | adoNet is used as the local persistence layer. | 1.2.21138.42021 |
| Helper | fiskaltrust.service.helper.rest | Adds a new endpoint for the communication protocol REST. | 1.2.19089.12258 |
PackageConfiguration - Helper
There are no more variables then the ones in the standard definition.
Example
"helpers": [
    {
        "Id": "|[helper0_id]|",
        "Package": "fiskaltrust.service.helper.rest",
        "Version": "1.2.19089.12258",
        "Url": ["http://localhost:1200/|[helper0_id]|"]
    }
],
PackageConfiguration - ftSignaturCreationDevices
| Name | Data type | Mandatory Default | Description |
|---|---|---|---|
Siret | string | yes | The commercial register number consisting of 14 digits. Has to be transfered with the query string or can be hardcoded. The number must be the exact same as used in the corresponding outlet in the fiskaltrust.Portal. |
CompanyName | string | yes | The name of the company of this CashBox. Has to be set with a query parameter or can be hardcoded in the template. Must be exact the same then the one used for registration of the company in the fiskaltrust.Portal. |
CountryCode | string | yes | 2 letter code for the country. Has to be FR. |
Example
"ftSignaturCreationDevices": [
    {
        "Id": "|[scu0_id]|",
        "Siret": "|[siret]|",
        "CompanyName": "|[company_name]|",
        "CountryCode": "FR"
    }
]
Configuration - ftQueues
| Name | Data type | Mandatory Default | Description |
|---|---|---|---|
init_ftQueue | Configuration | yes | Initialisation parameters for the queue (general part of the queue configuration). |
init_ftQueueFR | Configuration | yes | Initialisation parameters for the queue (national part of the queue configuration). |
init_ftSignaturCreationUnitFR | Configuration | no | Initialisation parameter for linking the queue with an SCU. |
connectionstring | string | no | Connection string to the persistence layer. See below for an example. With SQLite, this field can be omitted if no own database is available. In this case, an SQLite database is automatically created by installing the Lauchner. |
Examples for connection string
- Entity Framework:
Data Source=.\\!sql-instanz!;Initial Catalog=!fiskaltrust!;User ID=!user!;Password=!password!;MultipleActiveResultSets=True - mySQL:
Server=myServerAddress;Database=myDataBase;Uid=myUsername;Pwd=myPassword; - SQLite:
Data Source=c:\mydb.db;Version=3;Password=myPassword;
Example
   "ftQueues": [
       {
            "Id": "|[queue0_id]|",
            "Package": "fiskaltrust.service.sqlite",
            "Version": "1.2.21138.42021",
            "Configuration": {
                "init_ftQueue": [{ }],
                "init_ftQueueFR": [{ }],
                "init_ftSignaturCreationUnitFR": [{ }]
            }
        }
    ]
Configuration - init_ftQueue
| Name | Data type | Mandatory Default | Description |
|---|---|---|---|
ftQueueId | GUID (string) | yes GUID | Identification of the queue. The system variable ` |
ftCashBoxId | GUID (string) | yes | Identification of the CashBox. The system variable ` |
CountryCode | string | yes | The two letter code for the country. The only allowed value is FR. |
Timeout | int | no15000 | Timeout in milliseconds. |
Example
"ftQueues": [
    {
        "Configuration": {
            "init_ftQueue": [{
                    "ftQueueId": "|[queue0_id]|",
                    "ftCashBoxId": "|[cashbox_id]|",
                    "CountryCode": "FR",
                    "Timeout": 15000
                }
            ]
        }
    }
]
Configuration - init_ftQueueFR
| Name | Data type | Mandatory Default | Description |
|---|---|---|---|
ftQueueFRID | GUID (string) | yes | Identification of the queue. The system variable ` |
CashBoxIdentification | string (printable)ftyyyyMMddhhmmss | yes | Cash register serial number. Must be a printable string with max. 20 characters. This value must be unique in the PosOperator's account. |
ftSignaturCreationUnitFRId | GUID (string) | yes | The ID of the SCU to which this Queue should connect. The system variable ` |
Siret | string | yes | The commercial register number consisting of 14 digits. Has to be transfered with the query string or can be hardcoded. |
Example
"ftQueues": [
    {
        "Configuration": {
            "init_ftQueueFR": [
                {
                    "ftQueueFRId": "|[queue0_id]|",
                    "CashBoxIdentification": "CashBox_|[count]|",
                    "ftSignaturCreationUnitFRId": "|[scu0_id]|",
                    "Siret": "|[siret]|"
                }
            ]
        }
    }
]
Configuration - init_ftSignaturCreationUnitFR
If the object ftSignaturCreationDevices is used in the template the same values from the object must be used in this object.
| Name | Data type | Mandatory Default | Description |
|---|---|---|---|
ftSignaturCreationUnitFRId | GUID (string) | yes | Identification of the SCU to which this queue should connect. The system variable |
Siret | string | yes | The commercial register number consisting of 14 digits. Has to be transfered with the query string or can be hardcoded. The number must be the exact same as used in the corresponding outlet in the fiskaltrust.Portal. |
CompanyName | string | yes | The name of the company of this CashBox. Has to be set with a query parameter or can be hardcoded in the template. Must be exact the same then the one used for registration of the company in the fiskaltrust.Portal. |
OutletNumber | int | yes | The number of the outlet for which the SCU is used. The outlet has to exist in the fiskaltrust.Portal and the SIRET has to be checked in the outlet. For dynamic usage the outlet-number should be transferred in the query string. |
CountryCode | string | yes | 2 letter code for the country. Has to be FR. |
Example
"ftQueues": [
    {
        "init_ftSignaturCreationUnitFR": [
            {
                "ftSignaturCreationUnitFRId": "|[scu0_id]|",
                "Siret": "|[siret]|",
                "CompanyName": "|[company_name]|",
                "OutletNumber": "|[outlet_number]|",
                "CountryCode": "FR"
            }
        ]
    }
]
Send the template to the API
Template
{
    "ftCashBoxId": "|[cashbox_id]|",
    "ftSignaturCreationDevices": [{
            "Id": "|[scu0_id]|",
            "Siret": "|[siret]|",
            "CompanyName": "|[company_name]|",
            "CountryCode": "FR"
        }
    ],
    "helpers": [{
            "Id": "|[helper0_id]|",
            "Package": "fiskaltrust.service.helper.rest",
            "Version": "1.2.19089.12258",
            "Url": ["http://localhost:1200/|[helper0_id]|"]
        }
    ],
    "ftQueues": [{
            "Id": "|[queue0_id]|",
            "Package": "fiskaltrust.service.sqlite",
            "Version": "1.2.21138.42021",
            "Configuration": {
                "init_ftQueue": [{
                        "ftQueueId": "|[queue0_id]|",
                        "ftCashBoxId": "|[cashbox_id]|",
                        "CountryCode": "FR",
                        "Timeout": 15000
                    }
                ],
                "init_ftQueueFR": [{
                        "ftQueueFRId": "|[queue0_id]|",
                        "CashBoxIdentification": "API-CB-|[outlet_number]|",
                        "ftSignaturCreationUnitFRId": "|[scu0_id]|",
                        "Siret": "|[siret]|"
                    }
                ],
                "init_ftSignaturCreationUnitFR": [{
                        "ftSignaturCreationUnitFRId": "|[scu0_id]|",
                        "Siret": "|[siret]|",
                        "CompanyName": "|[company_name]|",
                        "CountryCode": "FR",
                        "OutletNumber": "|[outlet_number]|"
                    }
                ]
            },
            "Url": ["http://localhost:1200/ftAPI"]
        }
    ]
}
JSON string
"{\"ftCashBoxId\":\"|[cashbox_id]|\",\"ftSignaturCreationDevices\":[{\"Id\":\"|[scu0_id]|\",\"Siret\":\"|[siret]|\",\"CompanyName\":\"|[company_name]|\",\"CountryCode\":\"FR\"}],\"helpers\":[{\"Id\":\"|[helper0_id]|\",\"Package\":\"fiskaltrust.service.helper.rest\",\"Version\":\"1.2.19089.12258\",\"Url\":[\"http:\/\/localhost:1200\/|[helper0_id]|\"]}],\"ftQueues\":[{\"Id\":\"|[queue0_id]|\",\"Package\":\"fiskaltrust.service.sqlite\",\"Version\":\"1.2.21138.42021\",\"Configuration\":{\"init_ftQueue\":[{\"ftQueueId\":\"|[queue0_id]|\",\"ftCashBoxId\":\"|[cashbox_id]|\",\"CountryCode\":\"FR\",\"Timeout\":15000}],\"init_ftQueueFR\":[{\"ftQueueFRId\":\"|[queue0_id]|\",\"CashBoxIdentification\":\"API-CB-|[outlet_number]|\",\"ftSignaturCreationUnitFRId\":\"|[scu0_id]|\",\"Siret\":\"|[siret]|\"}],\"init_ftSignaturCreationUnitFR\":[{\"ftSignaturCreationUnitFRId\":\"|[scu0_id]|\",\"Siret\":\"|[siret]|\",\"CompanyName\":\"|[company_name]|\",\"CountryCode\":\"FR\",\"OutletNumber\":\"|[outlet_number]|\"}]},\"Url\":[\"http:\/\/localhost:1200\/ftAPI\"]}]}"
Query string
In the query string the description for several packages are included. This is the only way to overwrite the default values.
https://helipad-sandbox.fiskaltrust.cloud/api/configuration?outlet_number=26&siret=12345678912345&cashbox_description=CB_Local%20Outlet%20N%C2%B0%2026_18&queue0_description=QU_Local%20Outlet%20N%C2%B0%2026_18&scu0_description=SCU_Local%20Outlet%20N%C2%B0%2026_18&company_name=fiskaltrust%20SAS&helper0_description=REST_Local%20Outlet%20N%C2%B0%2026_18
Response of the API call
The API sends a response with all the initial values back to the sender. This JSON contains three objects: cashBoxId, accessToken and configuration. With this you can do an automatic rollout.
Download at first the Online Launcher form the fiskaltrust.Portal. This is a general zip-File with all the necessary files to run the fiskaltrust.Middleware on a local system.
It is important to ensure that the fiskaltrust.Middleware is initialized correctly, i.e. with the corresponding CashBox. The launcher provides a configuration file (fiskaltrust.exe.config) for this purpose. You can adapt this accordingly before rolling out the launcher to the operator's CashBox.
Please enter the values for cashboxid and accesstoken in the appSetting area you received as answer from the API-call.
<configuration>
  <appSettings>
    <add key="cashboxid" value="your-cashbox-id" />
    <add key="accesstoken" value="your-access-token" />
  </appsettings>
</configuration>
Now you can deliver the launcher with the customized configuration file to the operator's POS system and start it with fiskaltrust.exe or install it with install-service.cmd. The launcher will automatically download the configuration container for the cashboxid specified in fiskaltrust.exe.config from the fiskaltrust.Server and configure and start the fiskaltrust.Middleware accordingly.
Alternatively to adjusting the configuration in the fiskaltrust.exe.config file, you can pass the cashboxid and the accesstoken as parameters when starting the launcher (fiskaltrust.exe). This specification overwrites the existing configuration. The description of the possible start parameters can be found in the middleware documentation.