Configuration
The Portal manual is no longer maintained. For the latest documentation, please refer to the PosDealer or PosCreator section of this site.
In case of any questions, we encourage you to refer to our current fiskaltrust Documentation Platform.
For further details, check the corresponding Knowledge Base Articles (KBA), which can be found on the fiskaltrust.Portal.
For further information for PosCreators or PosDealers Rollout see chapter Rollout for PosCreators and PosDealers - Important process steps.
CashBox
Creation of a CashBox
 Screenshot-AT 56: Creating the configuration containers
![]() Text: "Here you can see all the cash registers you have created. You can add, delete or configure some."
Text: "Here you can see all the cash registers you have created. You can add, delete or configure some."
![]() To get to the creation and configuration of a queue, click on the menu item "Queue".
To get to the creation and configuration of a queue, click on the menu item "Queue".
![]() Click on [add] to create a new configuration container.
Click on [add] to create a new configuration container.
Add a CashBox
 Screenshot-AT 57: Configuration container - Add
![]() In this field, you can change the name of the configuration container.
In this field, you can change the name of the configuration container.
![]() If you are working in a network mode, enter the IP address of the endpoint here.
If you are working in a network mode, enter the IP address of the endpoint here.
![]() Click on [Save] to save the changes to the configuration container.
Click on [Save] to save the changes to the configuration container.
![]() Clicking [Cancel] cancels the operation without saving the changes.
Clicking [Cancel] cancels the operation without saving the changes.
Overview first CashBox
 Screenshot-AT 58: Overview - First configuration container
![]() After creating a CashBox, it is initially empty, it only has the CashBox ID and the AccessToken which are required to access the CashBox.
After creating a CashBox, it is initially empty, it only has the CashBox ID and the AccessToken which are required to access the CashBox.
![]() Here you can see the assigned queues, helpers, and SCUs. Since the configuration container has just been created and nothing is stored yet, the fields are empty.
Here you can see the assigned queues, helpers, and SCUs. Since the configuration container has just been created and nothing is stored yet, the fields are empty.
![]() By clicking on
By clicking on ![]() you can download the "dotnet Launcher". This must be used if there is an Internet connection to the cash register.
you can download the "dotnet Launcher". This must be used if there is an Internet connection to the cash register.
![]() The "dotnet useOffline Launcher" should be used if no internet connection can be established. This can be downloaded by clicking on
The "dotnet useOffline Launcher" should be used if no internet connection can be established. This can be downloaded by clicking on ![]() .
.
![]() If you are using a Linux system, download the "mono useOffline Launcher" by clicking on
If you are using a Linux system, download the "mono useOffline Launcher" by clicking on ![]() . This is set to "useOffline" by default.
. This is set to "useOffline" by default.
![]() If no carefree package has yet been purchased, the purchase can be made by clicking on
If no carefree package has yet been purchased, the purchase can be made by clicking on ![]() . If a package has already been purchased, the validity date is displayed here.
. If a package has already been purchased, the validity date is displayed here.
![]() The CashBox can be edited with a click on
The CashBox can be edited with a click on ![]() by Drag\&Drop.
by Drag\&Drop.
![]() The CashBox can also be edited in a list view by clicking on
The CashBox can also be edited in a list view by clicking on ![]() .
.
![]() By clicking on
By clicking on ![]() the cashbox can be deleted.
the cashbox can be deleted.
Edit CashBox by Drag \& Drop
 Screenshot-AT 59: Edit CashBox by Drag \& Drop
![]() Here you can see your already created queues. This corresponds to a data acquisition protocol and therefore a PosSystem in the sense of the RKSV.
Here you can see your already created queues. This corresponds to a data acquisition protocol and therefore a PosSystem in the sense of the RKSV.
![]() Here you can see your already created helpers. Further information see chapter Helpers.
Here you can see your already created helpers. Further information see chapter Helpers.
![]() Here you can see the signature creation devices that you have already created.
Here you can see the signature creation devices that you have already created.
![]() This field contains your CashBox. Using Drag\&Drop, you can now drag units that have already been created from and into the fields.
This field contains your CashBox. Using Drag\&Drop, you can now drag units that have already been created from and into the fields.
![]() Click on [Save] to save the changes to the configuration container.
Click on [Save] to save the changes to the configuration container.
Edit CashBox by List
Furthermore, the CashBox can be edited via a list.
 Screenshot-AT 60: Edit CashBox by list
![]() The list view is divided into three sections showing the available objects (Queues, Helper, Signature Creation Device)
The list view is divided into three sections showing the available objects (Queues, Helper, Signature Creation Device)
![]() The required objects can be added to the cash box by ticking the checkbox.
The required objects can be added to the cash box by ticking the checkbox.
![]() Click
Click ![]() to display the settings for each object.
to display the settings for each object.
Ready configured CashBox
 Screenshot-AT 61: Ready configured CashBox
![]() Text: "Here you can see all the cash registers you have created. You can add, delete or configure them."
Text: "Here you can see all the cash registers you have created. You can add, delete or configure them."
![]() By clicking on "+Add" you can create a new configuration container.
By clicking on "+Add" you can create a new configuration container.
![]() In the section Queues you will find the deposited cash register identification number as well as the automatically generated AES key (Base64 encryption)
In the section Queues you will find the deposited cash register identification number as well as the automatically generated AES key (Base64 encryption)
Only for Austria:
This key is required to register the cash register with FinanzOnline. By clicking on ![]() you can configure your queue(s) and set which signature creation devices the queue can access.
you can configure your queue(s) and set which signature creation devices the queue can access.
By clicking on ![]() you can edit them again.
you can edit them again.
![]() In this section you can see the connected helpers as well as the package name and version. By clicking on
In this section you can see the connected helpers as well as the package name and version. By clicking on ![]() you can edit them again.
you can edit them again.
![]() The connected signature creation devices are displayed here, and the package name and version are also displayed. By clicking on
The connected signature creation devices are displayed here, and the package name and version are also displayed. By clicking on ![]() you can edit them again.
you can edit them again.
Example: Overview several ready configured CashBoxes
 Screenshot-AT 62: Example: Overview - several ready configured CashBoxes
Delete a CashBox
 Screenshot-AT 63: Delete CashBox
For legal reasons it is currently not possible to delete a CashBox. However, there is the exception, that if the CashBox was not yet in use, it can still be deleted.
Download Launcher
 Screenshot-AT 64: Download Launcher
![]() By clicking on this button, you download the launcher you need for commissioning. This is a ZIP file that you download into the download folder. Extract the file from your download folder with a right-click, then click "Extract" and "Save".
By clicking on this button, you download the launcher you need for commissioning. This is a ZIP file that you download into the download folder. Extract the file from your download folder with a right-click, then click "Extract" and "Save".
Queue
Creating a queue
 Screenshot-AT 65: Creating the queue
![]() To get to the creation and configuration of a queue, click on the menu item "Queue".
To get to the creation and configuration of a queue, click on the menu item "Queue".
![]() Click on [Create new] to add a new queue.
Click on [Create new] to add a new queue.
Add a queue
 Screenshot-AT 66: Queue - Adding
![]() In this field, you can change the name of the queue.
In this field, you can change the name of the queue.
![]() Here you can select the appropriate storage method depending on your operating system.
Here you can select the appropriate storage method depending on your operating system.
![]() The package version can also be selected using a dropdown menu. These can be updated by clicking on
The package version can also be selected using a dropdown menu. These can be updated by clicking on ![]()
![]() Here you can set a timeout for the connection attempt with the signature creation device. (The time is given in milliseconds)
Here you can set a timeout for the connection attempt with the signature creation device. (The time is given in milliseconds)
![]() Enter the country in which you would like to use fiskaltrust here.
Enter the country in which you would like to use fiskaltrust here.
![]() Enter the desired health insurance identification number here.
Enter the desired health insurance identification number here.
![]() The system automatically generates the encryption key for you when you click on
The system automatically generates the encryption key for you when you click on ![]() .
.
![]() Click on [Save] to save the configuration of the queue.
Click on [Save] to save the configuration of the queue.
Fiskalization example for Germany
 Screenshot-AT 67: Fiskalization - Example Germany
German fiskalization does not (yet) include a signature creation device. This function is in test mode.
Queue overview
 Screenshot-AT 68: Queue overview
![]() Click on
Click on ![]() to go to the receipt check.
to go to the receipt check.
![]() Here the current status of the PosSystem is displayed, by clicking on
Here the current status of the PosSystem is displayed, by clicking on ![]() a message about the status can be sent.
a message about the status can be sent.
![]() By clicking on
By clicking on ![]() a status check is immediately transmitted to Finanz Online.
a status check is immediately transmitted to Finanz Online.
![]() By clicking on
By clicking on ![]() all transmitted receipts are displayed.
all transmitted receipts are displayed.
![]() The Action Journal can be accessed by clicking on
The Action Journal can be accessed by clicking on ![]() . All status changes and important actions are displayed here.
. All status changes and important actions are displayed here.
![]() The queue export can be started by pressing the button
The queue export can be started by pressing the button ![]() . For further information see chapter "Queue - Export" in the national appendices.
. For further information see chapter "Queue - Export" in the national appendices.
![]() The POS archive can be placed in the shopping cart by clicking on
The POS archive can be placed in the shopping cart by clicking on ![]() .
.
![]() By clicking on
By clicking on ![]() the connected SCUs can be displayed and managed.
the connected SCUs can be displayed and managed.
![]() Here the configuration of the queue can be opened by clicking on
Here the configuration of the queue can be opened by clicking on ![]() .
.
![]() Click on
Click on ![]() to edit the description, package version and timeout of the queue.
to edit the description, package version and timeout of the queue.
![]() Click
Click ![]() to delete the queue. However, the button for deleting the queue is currently inactive for legal reasons, so no queue can be deleted there will be an option to hide queues in the future.
to delete the queue. However, the button for deleting the queue is currently inactive for legal reasons, so no queue can be deleted there will be an option to hide queues in the future.
SCUs used by Queues
 Screenshot-AT 69: Queue - Connected Signature Creation Devices (SCU)
![]() By setting a check mark the SCU to be connected to the queue is selected.
By setting a check mark the SCU to be connected to the queue is selected.
![]() The previously selected URL of the SCU is stored here.
The previously selected URL of the SCU is stored here.
![]() The drop-down menu allows you to choose between different timeout modes. Normal and Backup, and different times.
The drop-down menu allows you to choose between different timeout modes. Normal and Backup, and different times.
![]() Click on [Save] to save the configuration of the queue.
Click on [Save] to save the configuration of the queue.
Queue configuration
 Screenshot-AT 70: Queue configuration
![]() In this field, you can change the name of the signature creation device.
In this field, you can change the name of the signature creation device.
![]() Here you can create a URL for your queue. By clicking on
Here you can create a URL for your queue. By clicking on ![]() you get a URL, which is suitable for local use without internet connection, because no firewall settings are required.
you get a URL, which is suitable for local use without internet connection, because no firewall settings are required.
![]() By clicking on
By clicking on ![]() , the system generates a URL for you with which the POS system can access the queue. You can rename the URL yourself. This can look like this: http://localhost:1200/Queuefiskaltrust
, the system generates a URL for you with which the POS system can access the queue. You can rename the URL yourself. This can look like this: http://localhost:1200/Queuefiskaltrust
![]() Click on [Save] to save the configuration of the queue.
Click on [Save] to save the configuration of the queue.
Receipt journal of a Queue
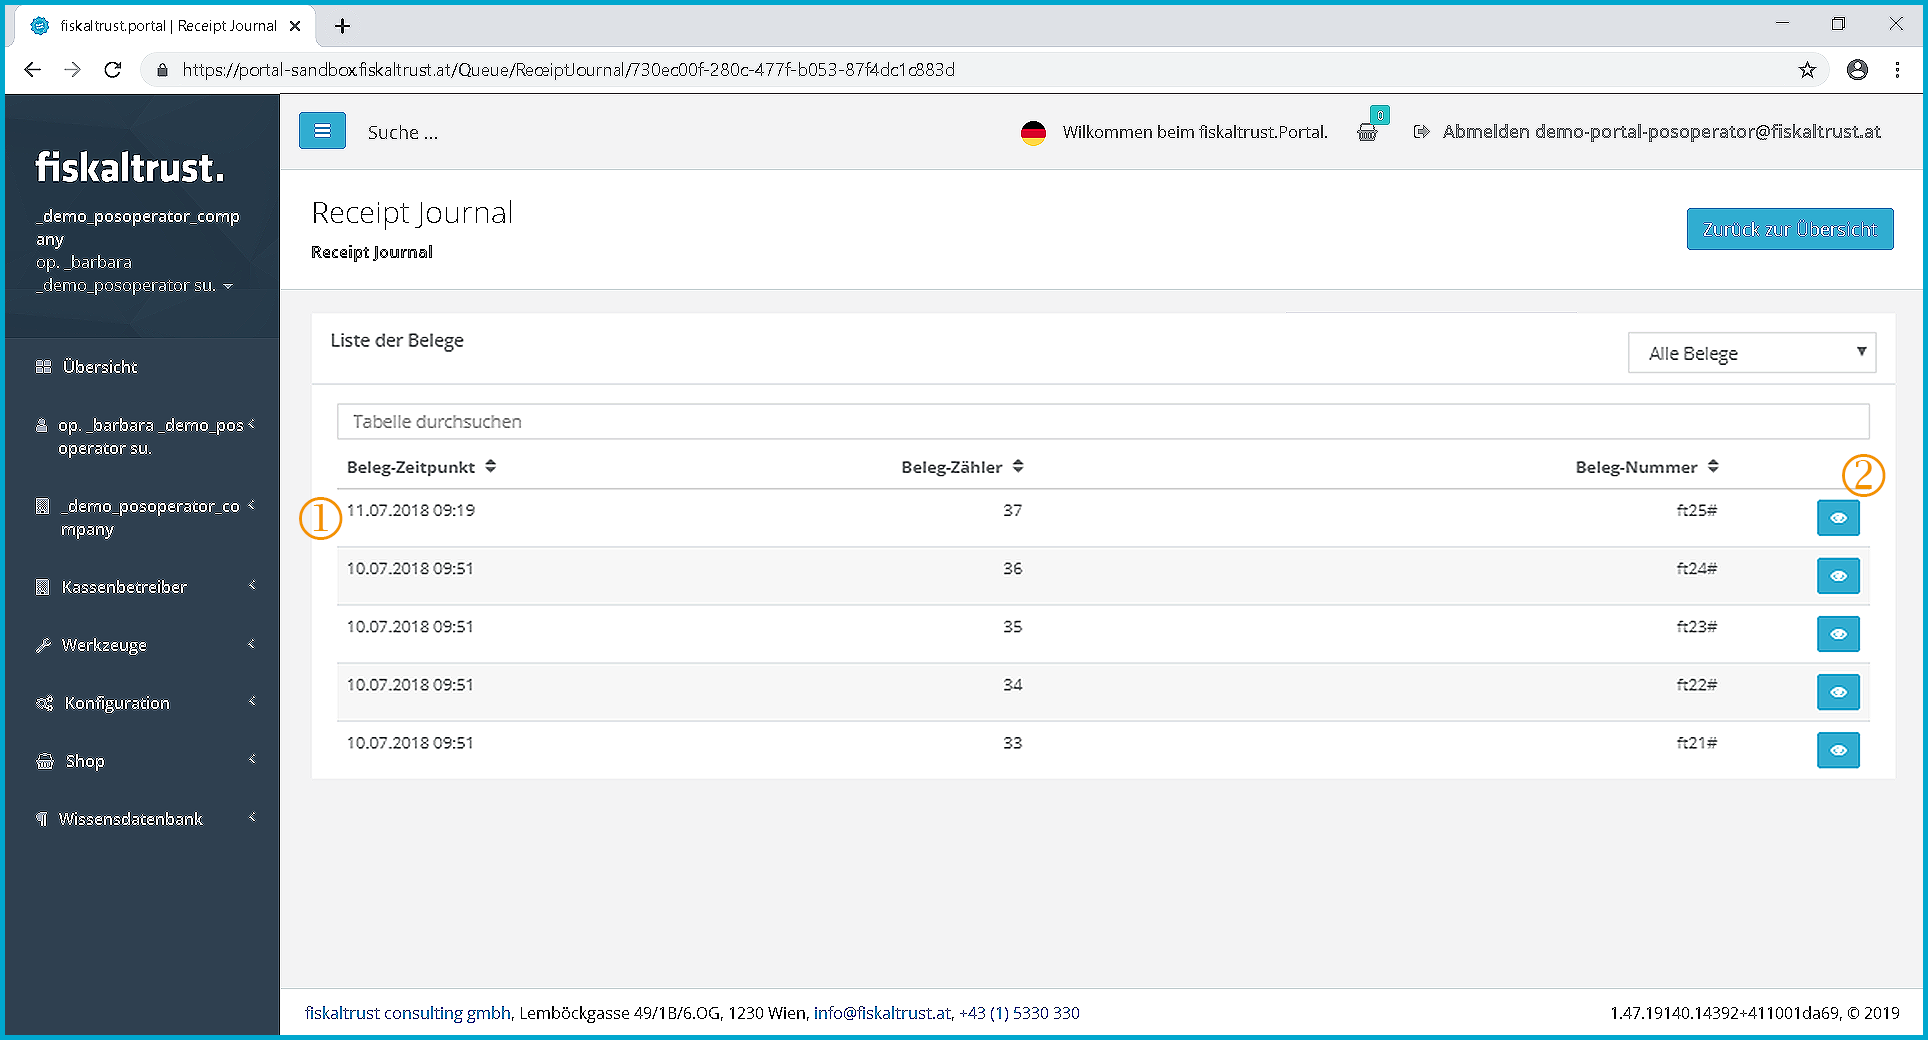 Screenshot-AT 71: Queue - Overview ReceiptJournal
![]() The receipts created so far are listed here.
The receipts created so far are listed here.
![]() Click on
Click on ![]() to display the respective receipt.
to display the respective receipt.
After selecting a receipt, it is displayed as follows.This view makes it possible to verify the accuracy of the receipt content.
 Screenshot-AT 105: Queue - Start receipt
Edit a queue
 Screenshot-AT 72: Queue - Edit
![]() In this field, you can change the name of the queue.
In this field, you can change the name of the queue.
![]() The previously selected package name is displayed here.
The previously selected package name is displayed here.
![]() Here you can select from the various package versions using the drop-down menu. These can be updated by clicking on
Here you can select from the various package versions using the drop-down menu. These can be updated by clicking on ![]() .
.
Export a queue
 Screenshot-AT 73: Queue - Export
![]() First you have to define the area which should be exported, this is done with the help of the receipt number and the slider.
First you have to define the area which should be exported, this is done with the help of the receipt number and the slider.
![]() The export format must then be dragged to the left
The export format must then be dragged to the left ![]() using Drag\&Drop.
using Drag\&Drop.
![]() The export target is also dragged to the left
The export target is also dragged to the left ![]() using Drag\&Drop.
using Drag\&Drop.
![]() Click on [Start] to start the export, then you will be redirected to a page showing the progress of the export. After completion of the export you will receive an info mail.
Click on [Start] to start the export, then you will be redirected to a page showing the progress of the export. After completion of the export you will receive an info mail.
Signature creation unit (SCU)
Creation of a SCU
 Screenshot-AT 74: Adding a signature creation device
![]() To create, configure and delete the signature creation devices, click on the "Signature creation device" menu item.
To create, configure and delete the signature creation devices, click on the "Signature creation device" menu item.
![]() Click on [Create] to open a page where a new signature creation device can be created.
Click on [Create] to open a page where a new signature creation device can be created.
Add Signature creation unit
 Screenshot-AT 75: Adding a signature creation device
![]() Text: "Here you can assign another signature creation device to your company. Enter the data and click on "Save".
Text: "Here you can assign another signature creation device to your company. Enter the data and click on "Save".
![]() Here you can name your signature creation device.
Here you can name your signature creation device.
![]() Here you can select the package to be used. This must be specified by the PosCreator.
Here you can select the package to be used. This must be specified by the PosCreator.
![]() Click on [Save] to save the configuration of the SCU.
Click on [Save] to save the configuration of the SCU.
Overview of Signature creation units
 Screenshot-AT 76: Overview - Signature Creation Devices (SCU)
![]() To get to the configuration of the signature creation devices, click on the menu item "Signature creation device".
To get to the configuration of the signature creation devices, click on the menu item "Signature creation device".
![]() Click on [Create] to go to the page for creating a new signature creation device.
Click on [Create] to go to the page for creating a new signature creation device.
![]() The name of the SCU is displayed here.
The name of the SCU is displayed here.
![]() By clicking on
By clicking on ![]() , the basic settings and package configuration for individual use of the signature creation device in the cash register can be called up again.
, the basic settings and package configuration for individual use of the signature creation device in the cash register can be called up again.
![]() By clicking on
By clicking on ![]() things like the description, package name, version and mode of SCU may be edited.
things like the description, package name, version and mode of SCU may be edited.
![]() Click on
Click on ![]() to delete the SCU. However, the button to delete the helper is currently inactive for legal reasons, so no helper can currently be deleted.
to delete the SCU. However, the button to delete the helper is currently inactive for legal reasons, so no helper can currently be deleted.
![]() A brief overview of the data for the selected signature creation device is displayed here.
A brief overview of the data for the selected signature creation device is displayed here.
![]() The search function can be used to search for a SCU by entering any parameter in the search field.
The search function can be used to search for a SCU by entering any parameter in the search field.
Configuration of a Signature creation unit
 Screenshot-AT 77: Signature Creation Device - Configuration
![]() The serial number of the certificate is stored here after creation.
The serial number of the certificate is stored here after creation.
![]() In this field, you can change the name of the signature creation device.
In this field, you can change the name of the signature creation device.
![]() Here you can create a URL for your signature creation device. By clicking on
Here you can create a URL for your signature creation device. By clicking on ![]() you get a URL, which is suitable for local use without internet connection, because no firewall settings are required.
you get a URL, which is suitable for local use without internet connection, because no firewall settings are required.
![]() By clicking on the
By clicking on the ![]() , the system generates a URL for you with which the POS system can access the SCU. You can rename the URL yourself. This can look like this: http://localhost:1200/SCUfiskaltrust
, the system generates a URL for you with which the POS system can access the SCU. You can rename the URL yourself. This can look like this: http://localhost:1200/SCUfiskaltrust
![]() Click on [Save] to save the configuration of the SCU.
Click on [Save] to save the configuration of the SCU.
Edit a Signature creation unit
 Screenshot-AT 78: Signature creation device - Edit
![]() In this field, you can change the name of the signature creation device.
In this field, you can change the name of the signature creation device.
![]() Here you can use the dropdown menu to select from the various package names.
Here you can use the dropdown menu to select from the various package names.
![]() The package version can also be selected using a dropdown menu. These can be updated by clicking on
The package version can also be selected using a dropdown menu. These can be updated by clicking on ![]() .
.
![]() In the field Mode you can choose between the different modes "Normal", "Backup" and "Deactivated".
In the field Mode you can choose between the different modes "Normal", "Backup" and "Deactivated".
![]() Click on [Save] to save the configuration of the SCU.
Click on [Save] to save the configuration of the SCU.
Delete a Signature creation unit
For legal reasons, it is currently not possible to delete the signature creation device.
 Screenshot-AT 79: Signature creation device - Delete
![]() The button for deleting a SCU is currently inactive.
The button for deleting a SCU is currently inactive.